‘Why should I do that if I can buy it right away?’ — that’s the question you may be asking yourself coming across another smartly composed tutorial on a watercolor texture. And your flow of thought might be right, yet there is a ‘but’.
For a designer, mastering a vast number of techniques, another skill brought in a tutorial is not just a piece of fun or a thing they can boast of. Primarily, it’s always about your artistic freedom and a chance to assert yourself. It’s always great to bring your aesthetics and your vision and no other designer can do it better than you. And it’s even better to see your creative idea being conveyed in the best way the one could possibly imagine.
Today we’re glad to share a simple yet an essential seamless watercolor texture tutorial for Photoshop. You must know already that no great design project can do without the right background, texture or pattern. As an ultimately versatile item, a seamless pattern of the kind we intend to craft today is a creative must-have and having such tool at hand anytime to apply it in a click is a victory.
Follow 7 simple steps and check it for yourself: not so many handy skills can be acquired that easily.
Step 1
I recommend starting with a nice source artwork — so pick up some watercolor paper (A4 or US letter format is the most simple and convenient solution), watercolors, a brush, a container of water and release your creativity. You can always find some cute tutorials on how to mix watercolors into fantastic, even cosmic backgrounds. Or you can start with one or two colors youlove best — anyhow, the watercolor texture you will get in the end is meant to be absolutely unbeatable.
As soon as your painting is completely dry, you should scan it in 300 ppi resolution and PNG format. OR you can forget everything you’ve already read and use my ready-made artwork, that I’ve already painted, scanned and attached for your further experiments.
Step 2
Create a new document in Adobe Photoshop (Cmd+N) with 1200х1200 size and 300 ppi resolution. Open your image in Photoshop. Hold left button of the mouse to drag & drop it to the created document. Now you can see it as Layer 1 placed above the Background layer. It may be looking a bit too blurry and grainy — so, to make it sharper and cleaner, resize the layer with the artwork decreasing its size (Сmd+T).
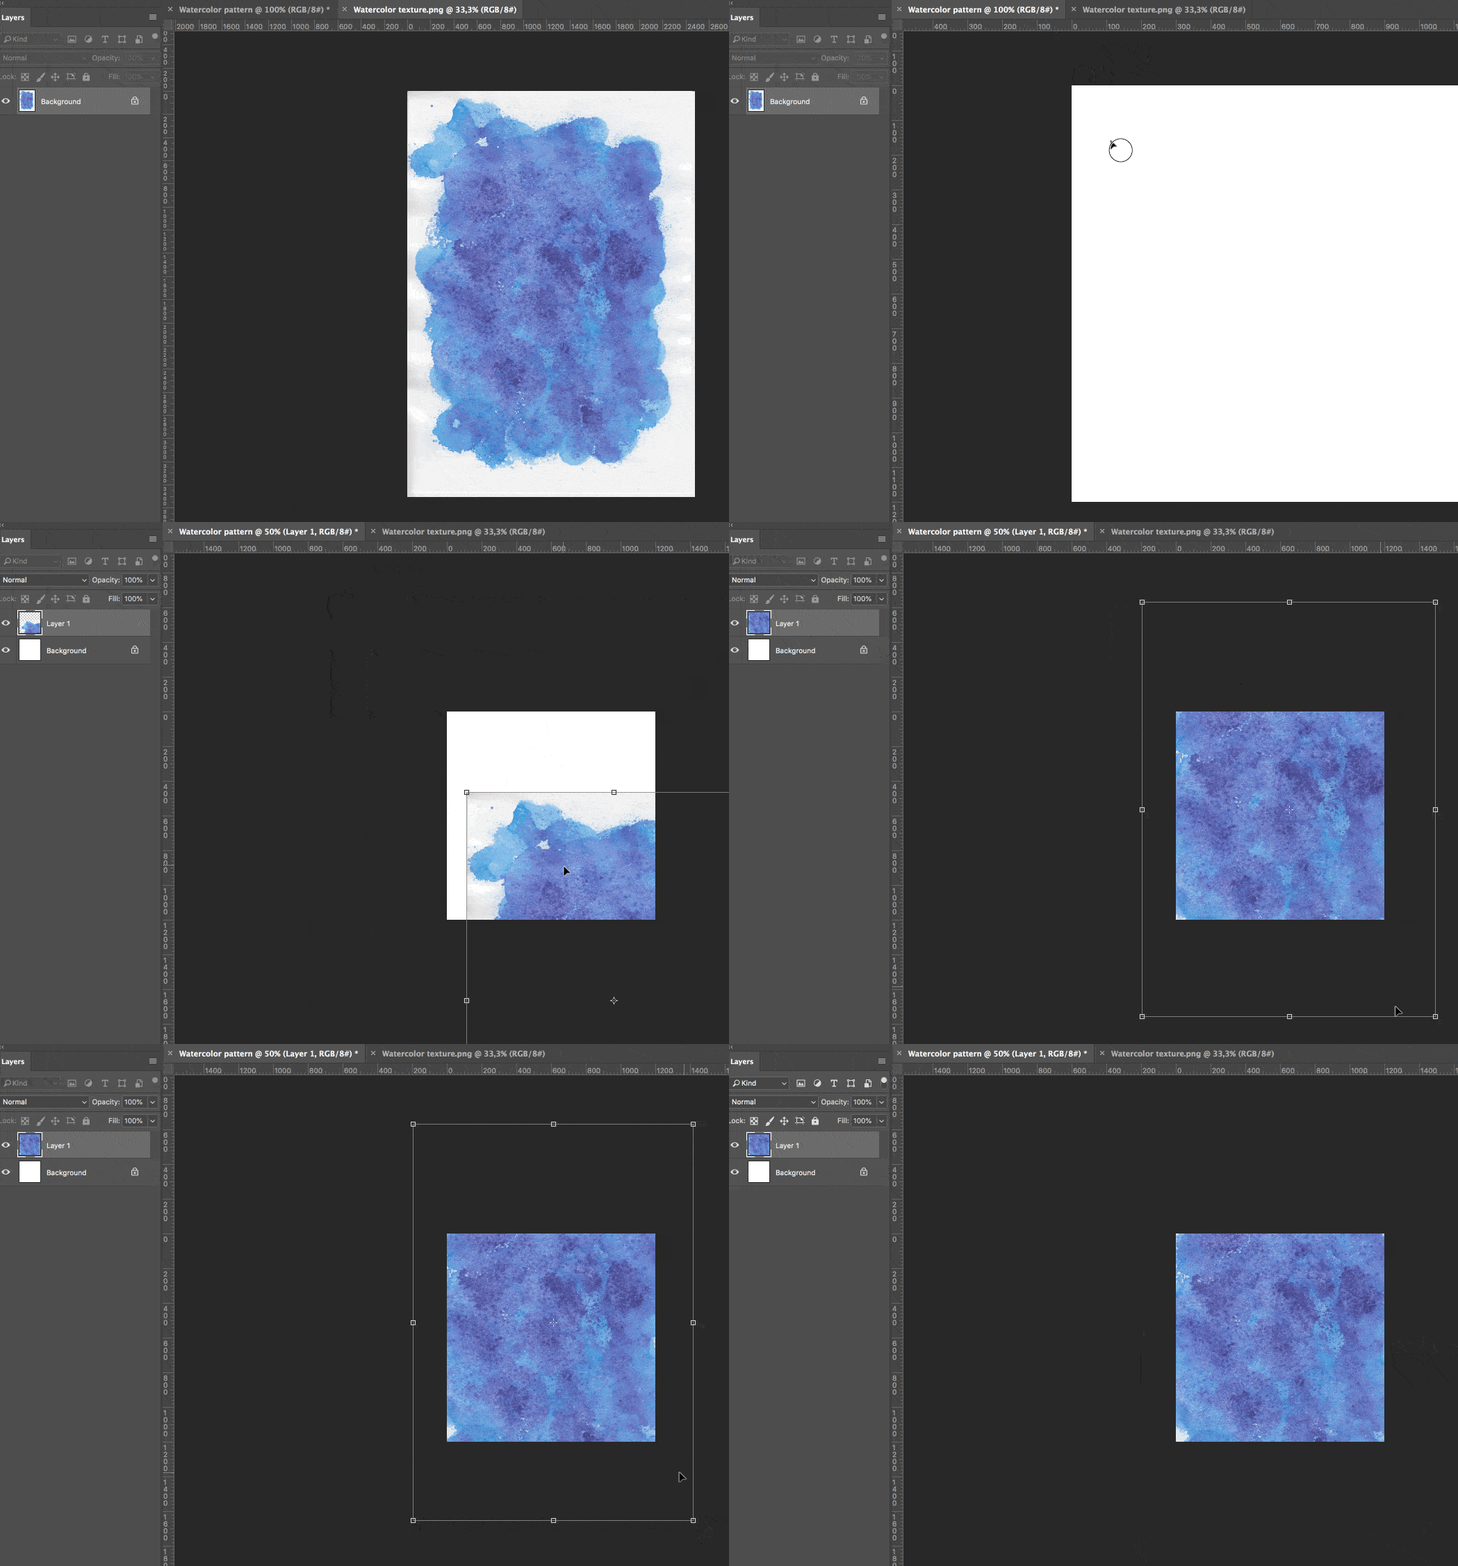
Step 3
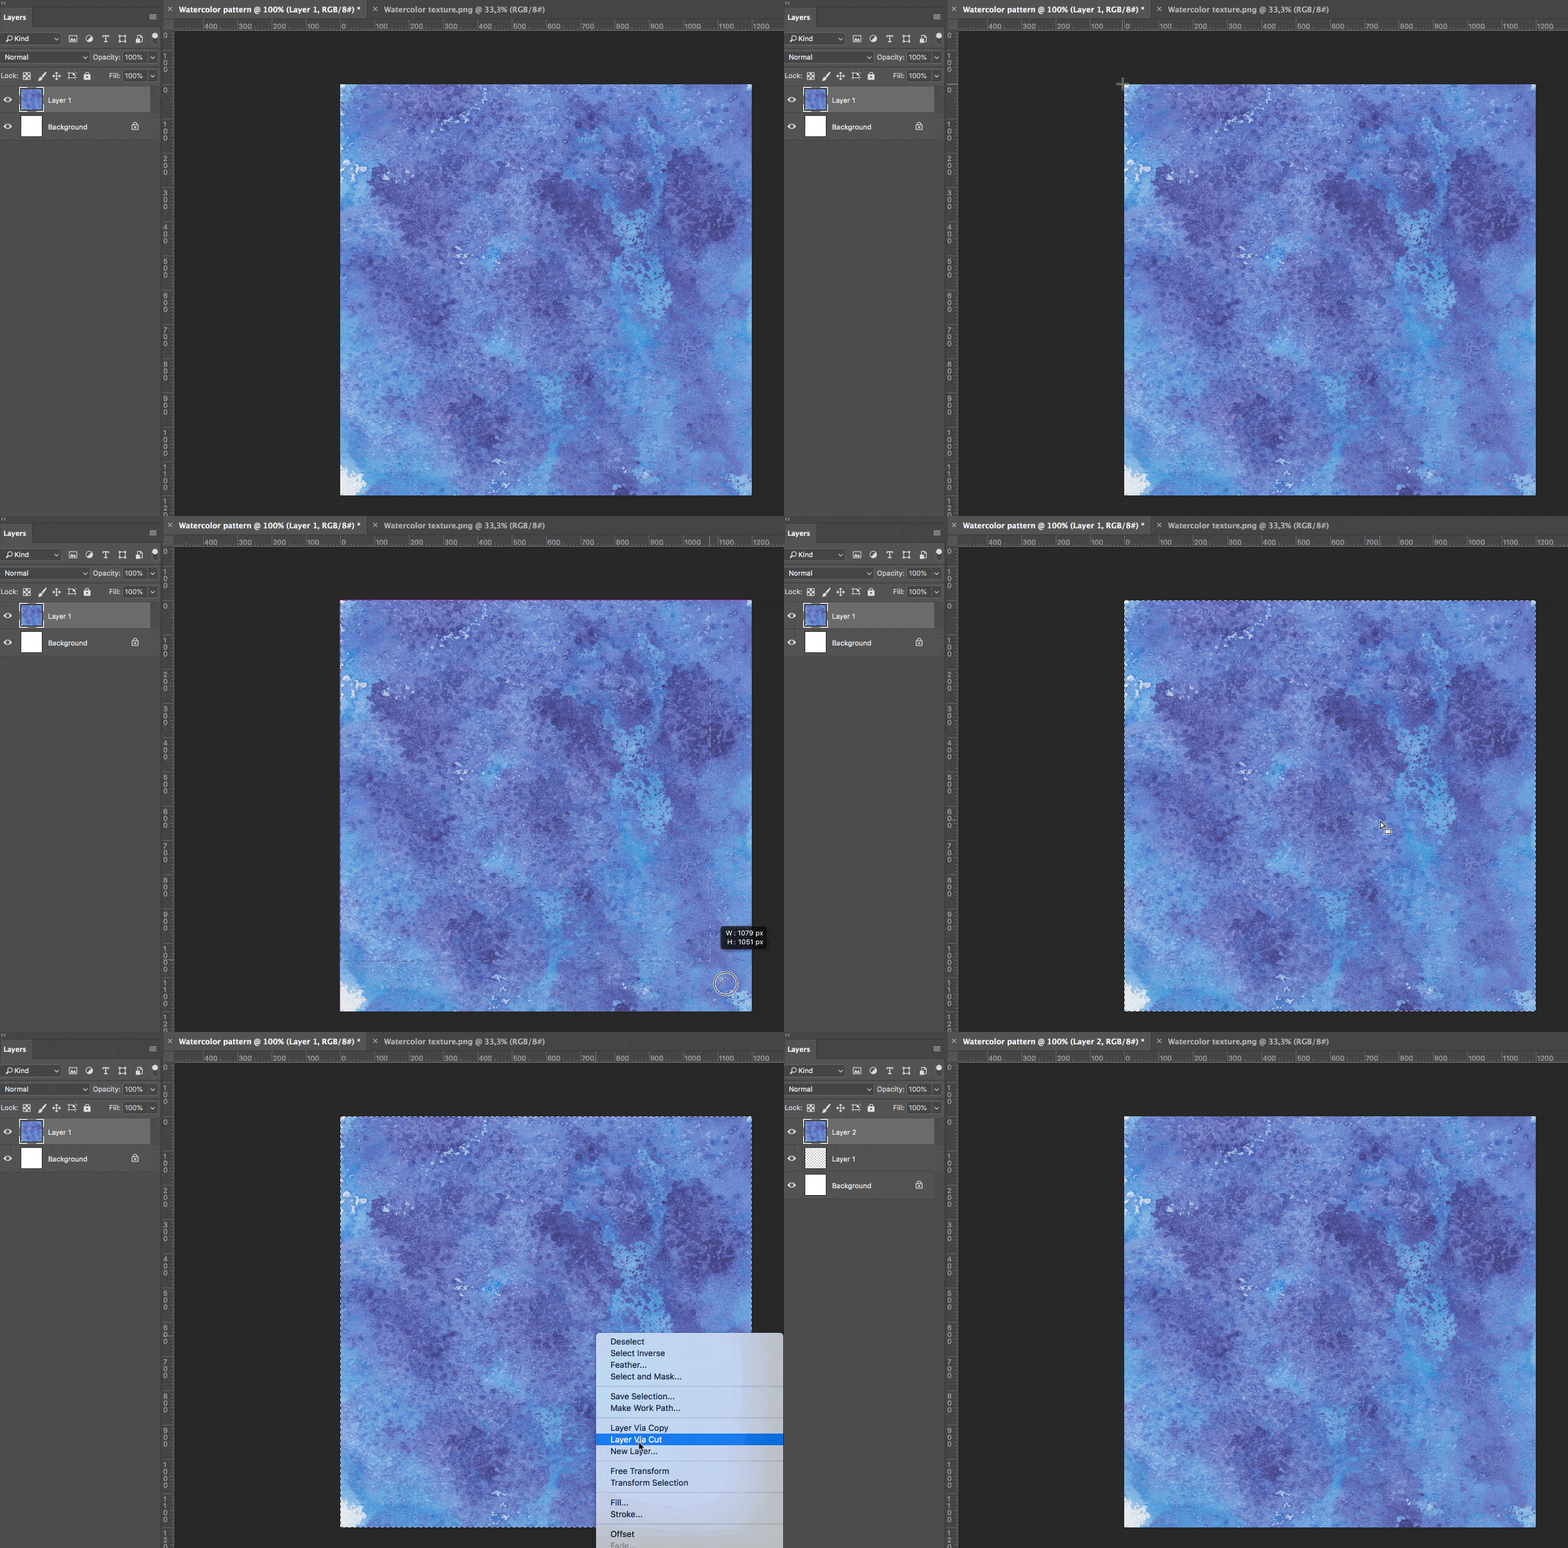
Now, use the Rectangular Marquee Tool (M) to select the area of the same size as the artboard. Once you’ve made the selection, right-click on it and select the Layer Via Cut option from the contextual menu. Now you have a new layer, which you will soon turn into a seamless pattern.
Step 4
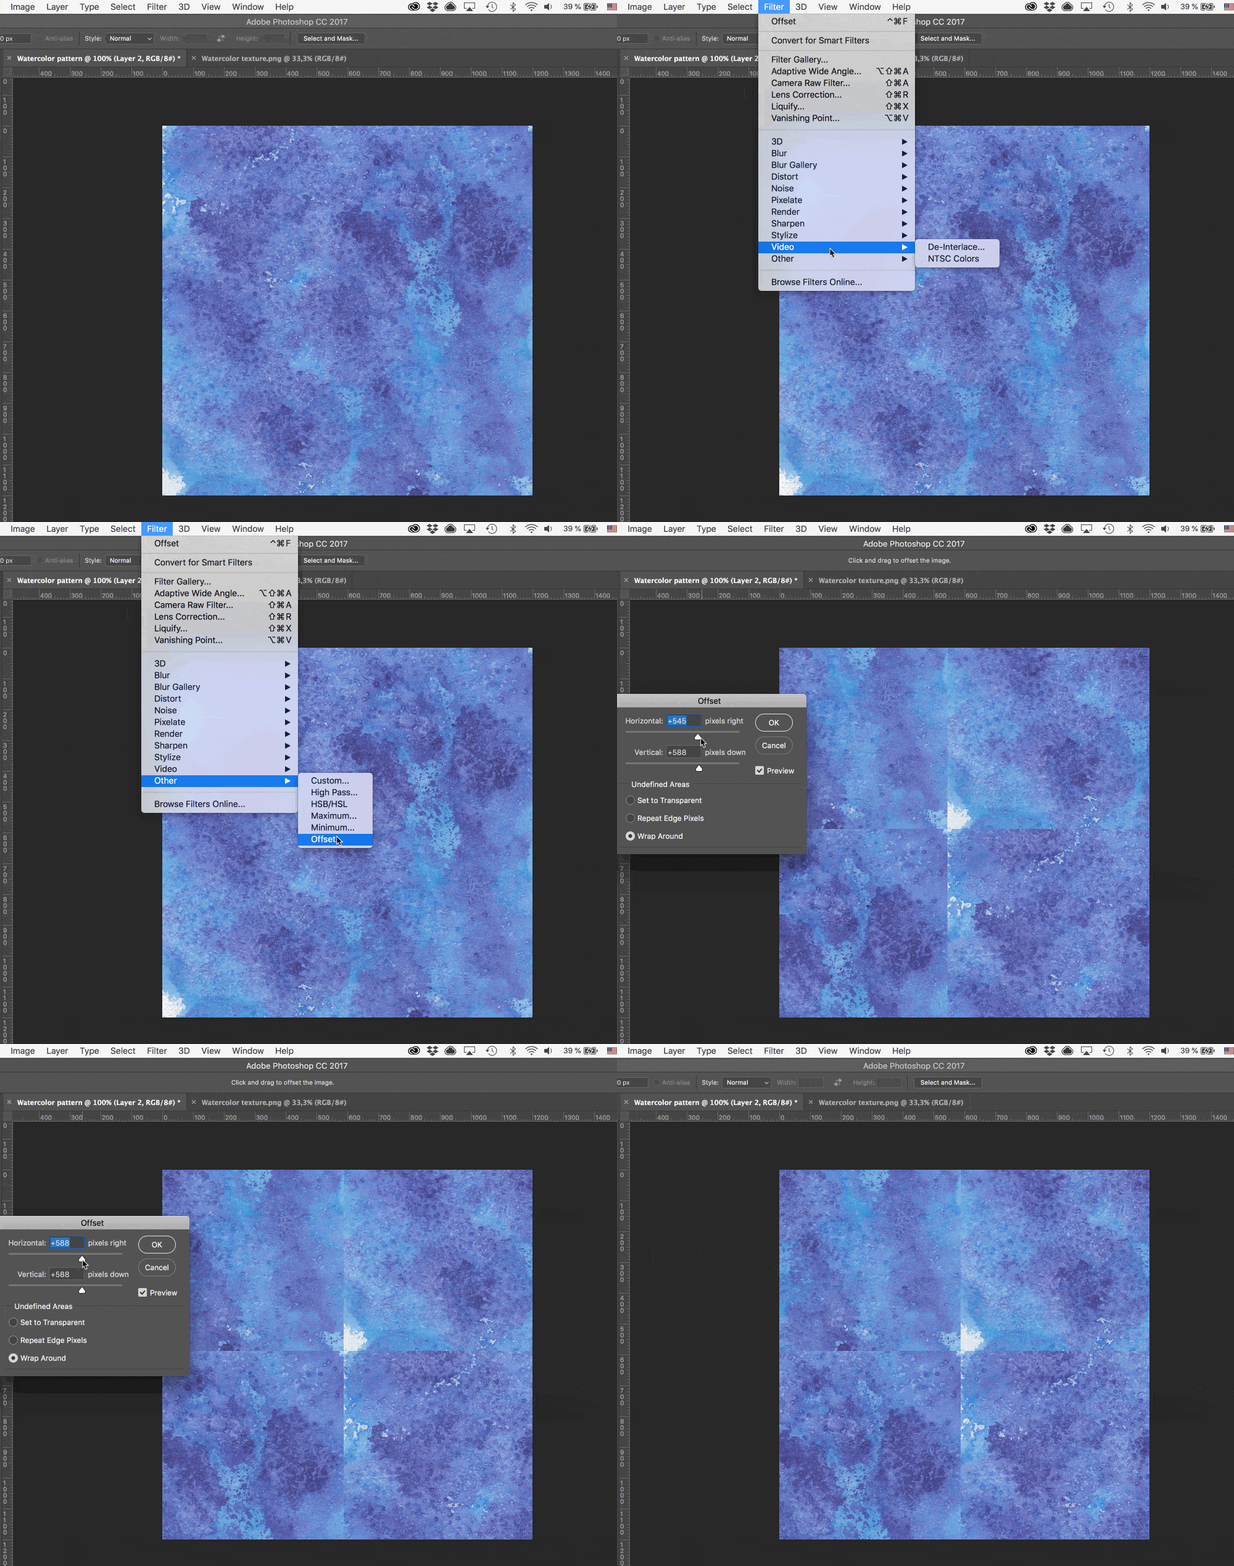
Then choose Filter > Other > Offset:
This filter helps you to offset your image horizontally and vertically, allowing you to see where the pattern has its seams. Try to make the 4 squares you get in the preview equal. As a rule, they render equal automatically, but sometimes you should tweak Horizontal and Vertical offsets manually. As soon as you obtain the result you need, press OK.
Step 5
Now your goal is to get rid of the seams and make the texture 100% tileable. To make it happen, use the Rectangular Marquee Tool (M) with the Feather parameter on 3 px. Select a small area around the seam with the Marquee Tool (M) and press Shift+Delete. And, finally, here is the parameter of the Fill, that you should use: Contents > Content-Aware; Mode > Normal; Opacity > 100%. Press OK or Enter on your keyboard to apply the effect.
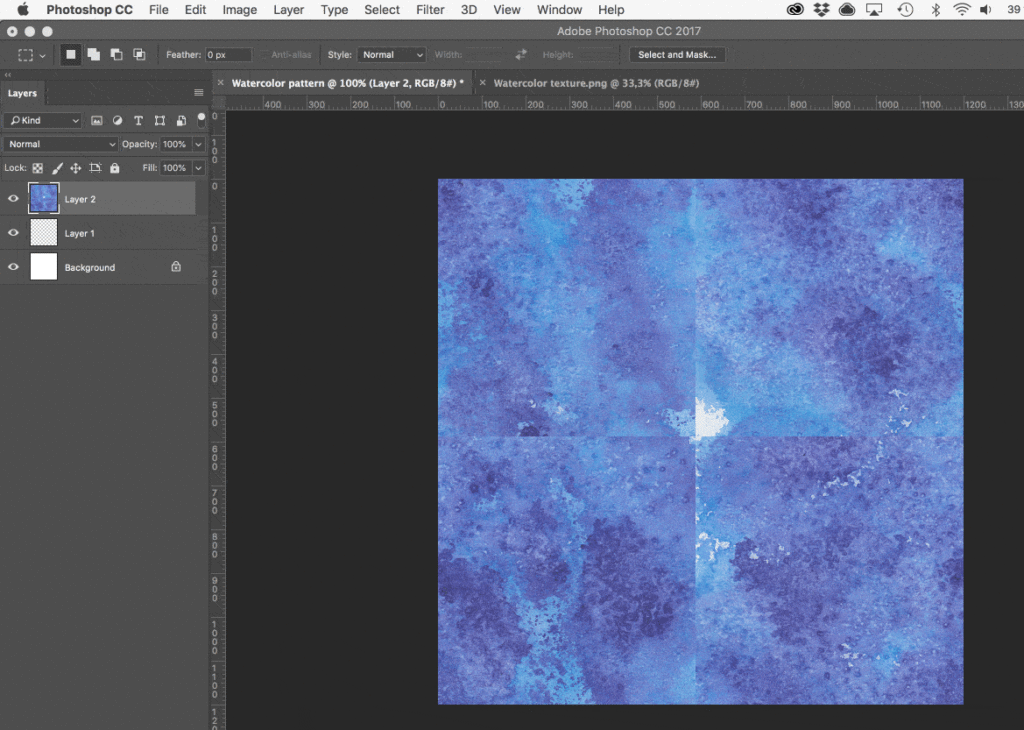
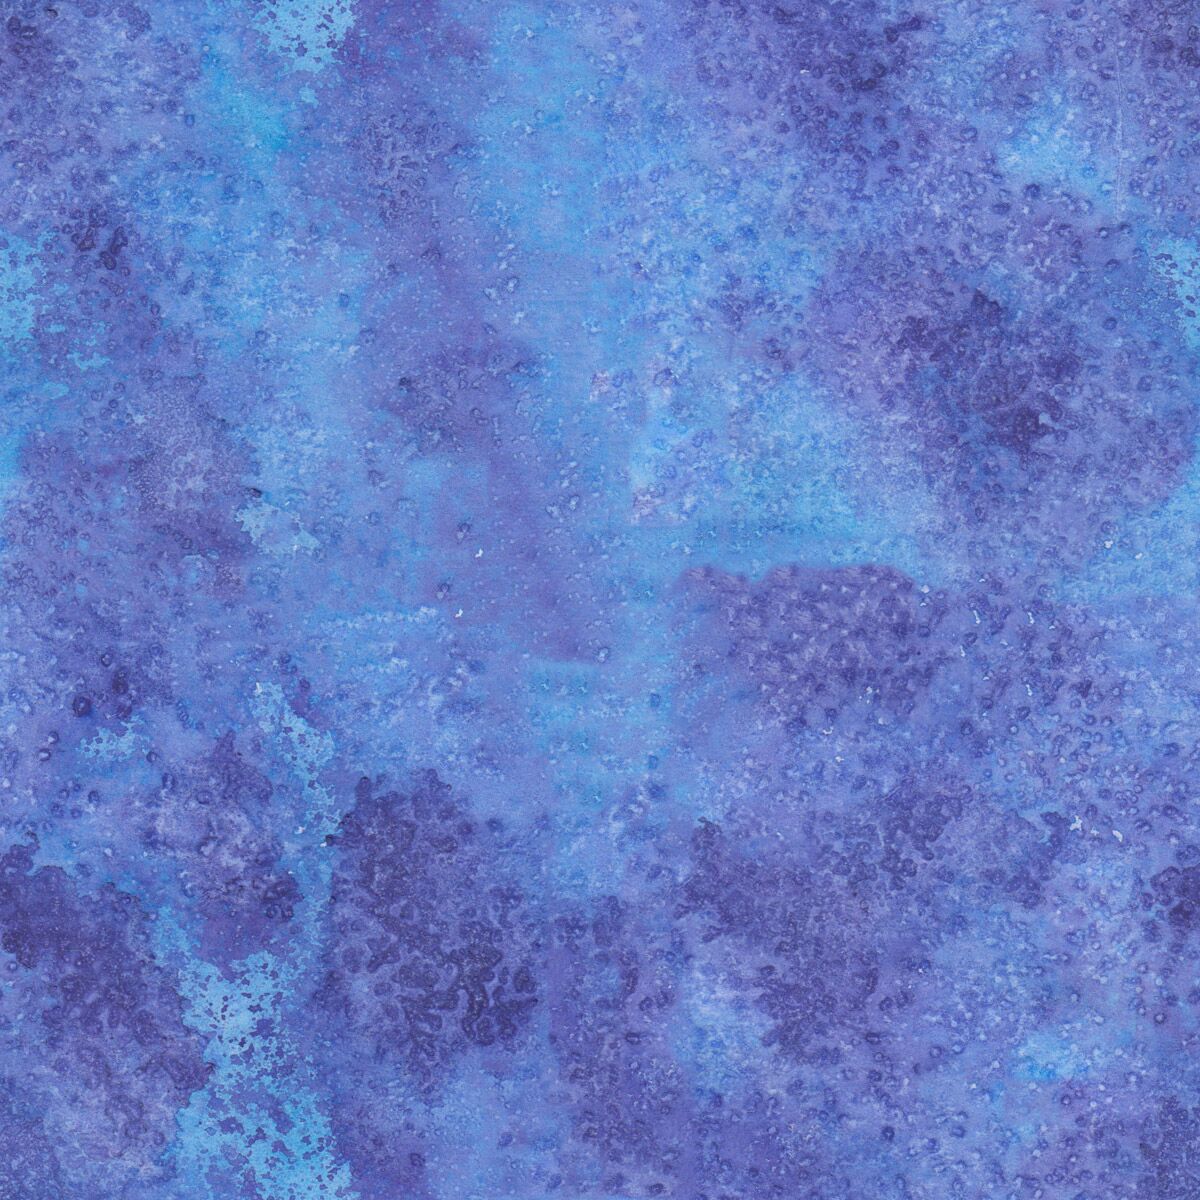
Now you should repeat this step until all seams are gone and you’re 100% delighted with how your texture looks. Also, this operation must be helpful if you want to get rid of specks, hairs from the brush or any other imperfections of the source image.
That’s how your pattern should finally look like:
Step 6
Go back and repeat Step 4 and Step 5 until the texture on Step 4 is absolutely seamless. This way you’re getting much closer to the desired result.
Step 7
Only one step is left — to create a Photoshop pattern. Define it by choosing Edit > Define Pattern > and title it something like Watercolor Pattern (or pick a more extraordinary name if you like).
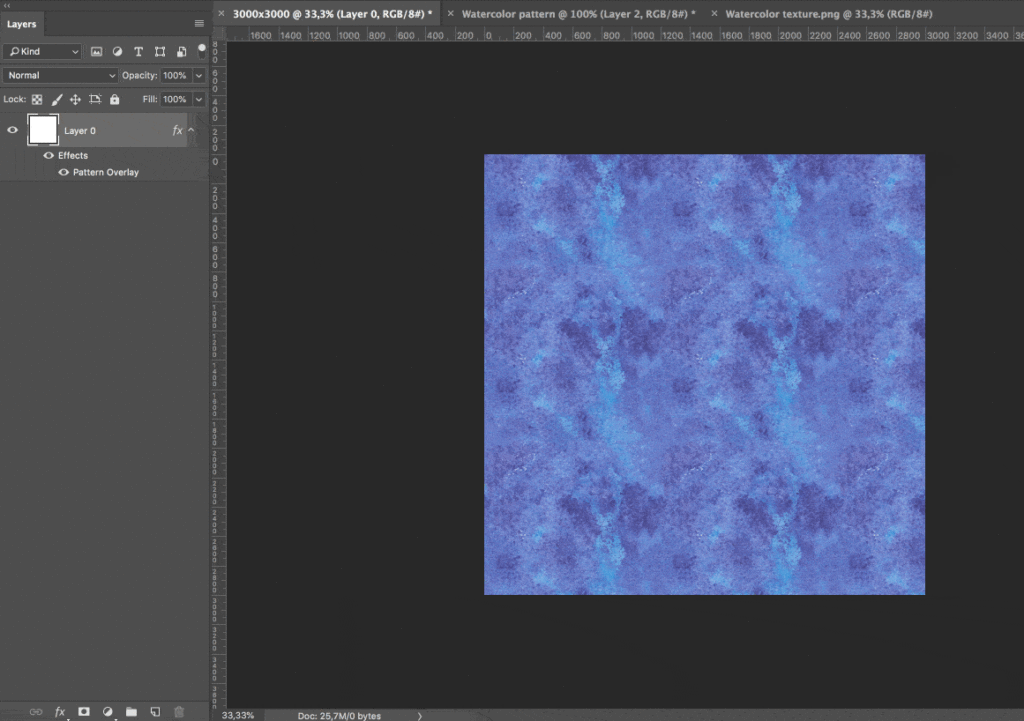
And it’s time for a final seamless test. Create a new document twice bigger than yours: 3000х3000 pixels and 300 ppi resolution. Choose the initial Layer and click on the fx icon: Add a layer style > Pattern Overlay. Pick your freshly-saved pattern from the pattern menu with 100% scale and press OK.
Now you should take a long hard look at the canvas trying to detect any signs of seams on your pattern. In case you find any, go back to Watercolor Pattern.psd (or how have you titled it?), find the flaw and remove it taking Step 4 and Step 5 again. Once polishing is done, you get your fabulous seamless watercolor texture.
Step 8
It’s absolutely easy to export your pattern for the further use or sharing. Just return to the Pattern Overlay, and go to the Pattern > Present Manager after clicking on the gear icon. Left-click on you pattern to pick it , choose Save Set > *title it* > Press Save.
Are you still here? Greatest congrats, you’ve just crafted your first watercolor texture and added a new invaluable skill to your toolbox. Hasn’t it been that simple and amusing? We’ll be glad to see your patterns, as well as answer your questions if you have any! So don’t hesitate to drop a line below

