The Designest may receive compensation from companies, products, and services featured in this publication. For more details, please refer to our Affiliate Disclosure page.

Speaking of preps, the only required thing is having an active Adobe Photoshop subscription. Make sure you use this software and nothing else, as the described steps are only applied to Photoshop. This tutorial is very explanatory, but of course, having the basic designing skills wouldn’t hurt. You’re going to work with the text layer style settings, bevel & emboss layer effect to carry out a gloss contour, and many other simple, yet very handy options the app has to offer. Besides, we’ve added many hotkeys to make the process of designing gold text effect in Photoshop faster. Hop on a learning train, as it’s about to depart!
Step 1
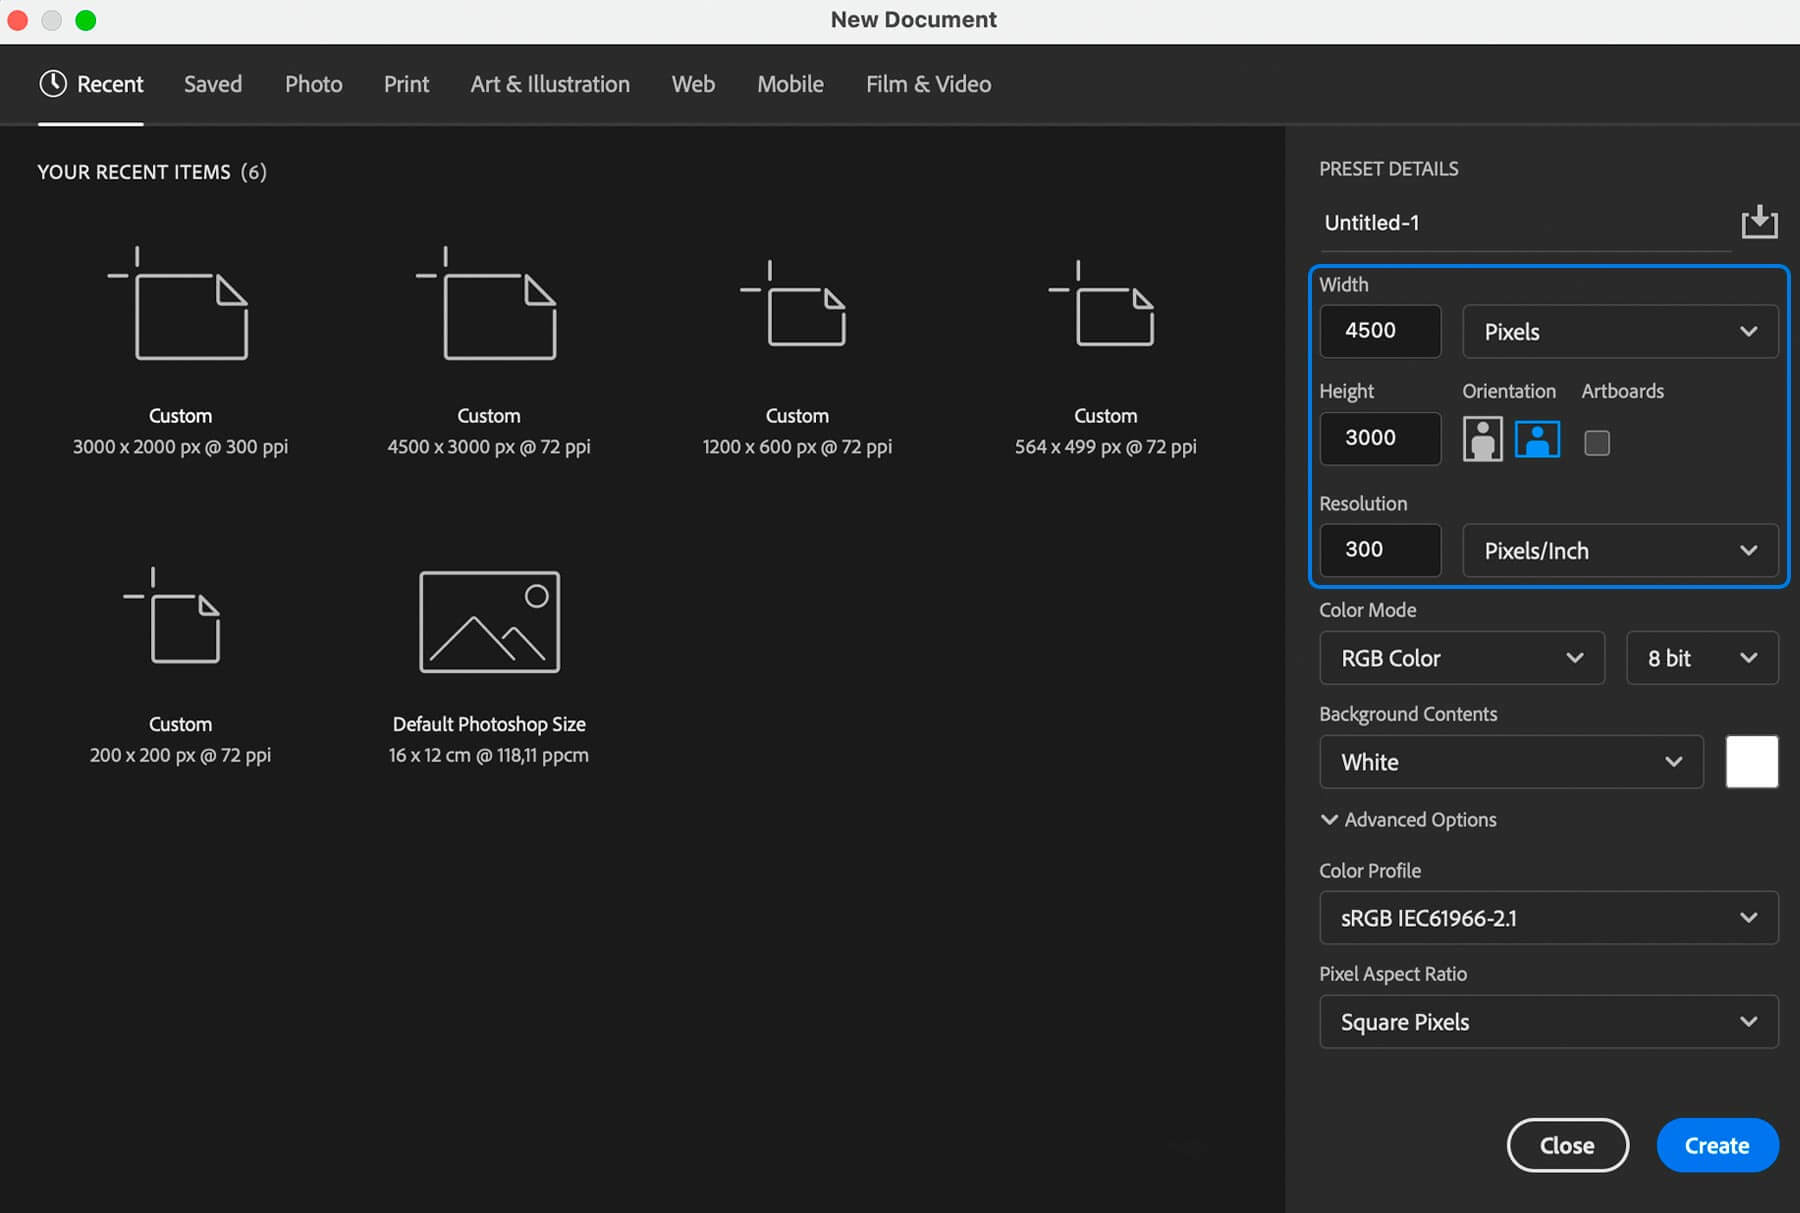
Open Adobe Photoshop and create a new Photoshop document. Do so by clicking New File on the left side of the main panel, or choose File > New. We decided to set 4500 pixels width and 3000 pixels height, 300 dpi resolution for this gold text effect. This resolution would allow adding texts of any size. Press Create to continue with the file.
Step 2
You get to see an empty white layer that’s about to become the future composition. Click the lock icon on it to make it disappear, which means the layer is open for any further changes from now on. Double-click the layer’s name (it’ll be set as Layer 0), name it Background again. It’s crucial to keep every layer or created folder named accordingly to never lose navigation, and be sure about the unexpected changes you might make on the way.
The background layer will remain the lowest in the layers panel, which means all the other ones will be added atop of it. You can fill the background layer with a darker shade to highlight the rest of added layers with their characteristics and make sure they’re visible. Select the Paint Bucket tool in the left menu, choose the required color and click the artboard with it.
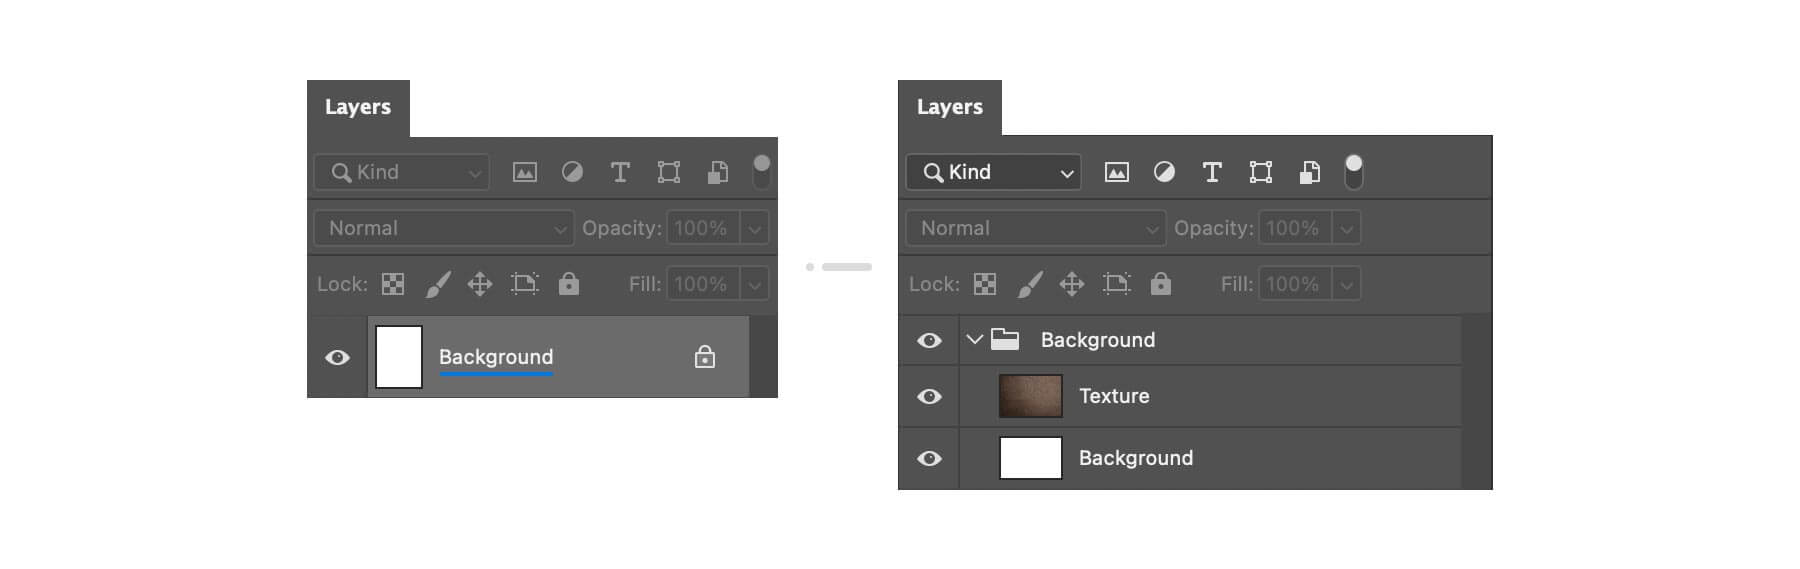
The second option would be uploading a ready-made texture from some stock library. We’ve used a free downloaded brown suede image, suitable for gold text. Please pay attention to the image’s resolution when browsing for the texture options: the small graphics would appear pixelated and presented in a poor quality. Drag & drop the downloaded texture into the Photoshop window. Double-click the layer and name it Texture.
Step 3
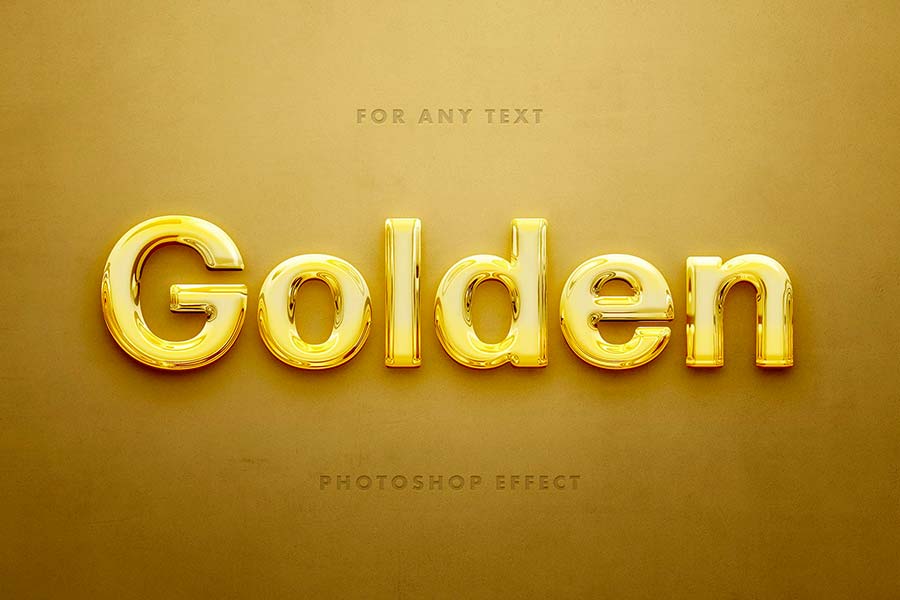
Create a new layer and call it Effect, which will be a key one for the whole gold text effect. Pick Type Tool on the left Photoshop panel (or trigger it by pressing T on your keyboard). Type something on the layer, and don’t forget to toggle the settings. We’ve used AnnabelleJF Regular font, 228 pt size, and black font color. But you can surely have the ones of your own: depending on the word’s length, the font size would differ as well.
Select Move tool (or press V on your keyboard) and move the phrase the way it’s placed right in the middle of an artboard. The purple ruler lines would help you out to set the proper proportions.
Right-click the Effect layer itself, and in the appeared menu for this layer style, choose Convert to Smart Object.

Double-click the layer’s thumbnail to open it, not the layer itself or its name. This is quite a simple step, but based on our experience, it’s often overlooked when working with Smart Objects.
In the appeared text layer, you’ll see the little field with your writing in it. We need to expand this area to the size of our artboard in order to provide freedom for the future changes to the text layer irrespective of the added text or typeface. To do so, press Option + Cmd/Ctrl + C to open the Canvas size menu. Set the required dimensions: 4500×3000 px, click Ok. There you’ll have a bigger working area. Press Cmd+S to save the result. Close the tab.
Step 4
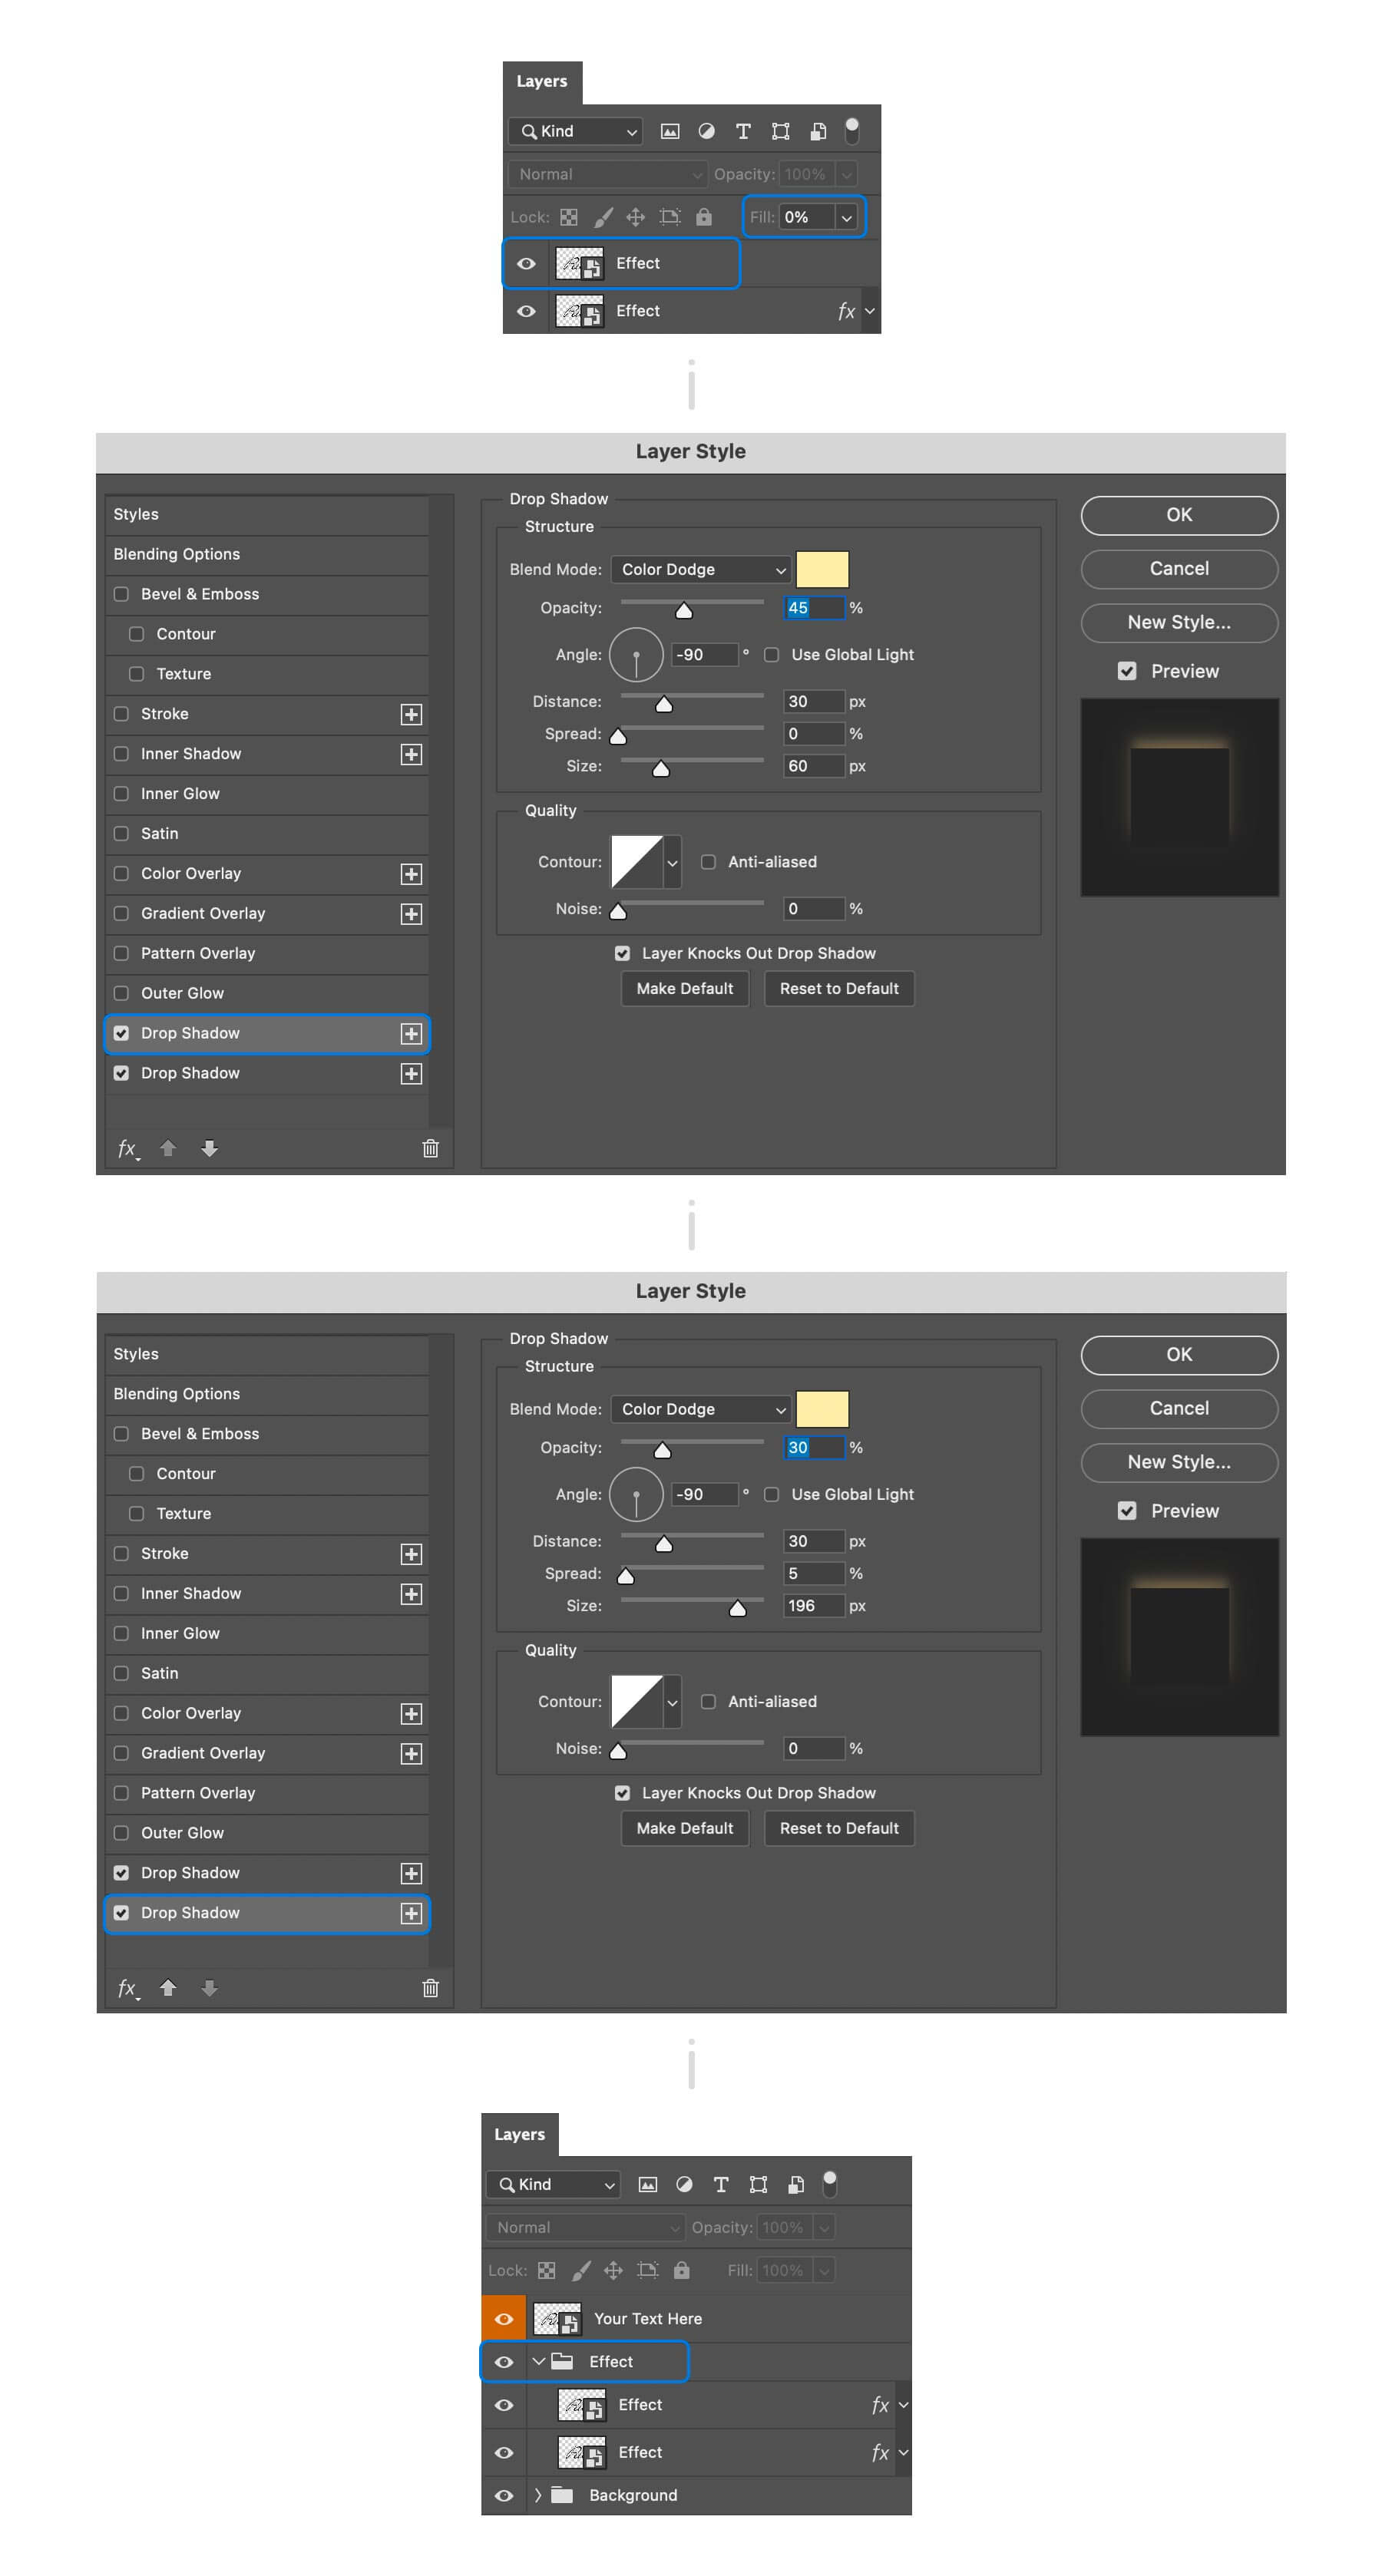
Now we need to have 3 copies of the Effect layer. Select the Effect layer, press Cmd/Ctrl + C then Cmd/Ctrl + V to insert the copied layer. Select the top layer, reduce its opacity settings to 0%. We’ll need this one for future modifications with gold text effect, so to have it highlighted, right-click the area around an eye icon, and pick any color. Name it Your Text Here. This is what your panel should look like.

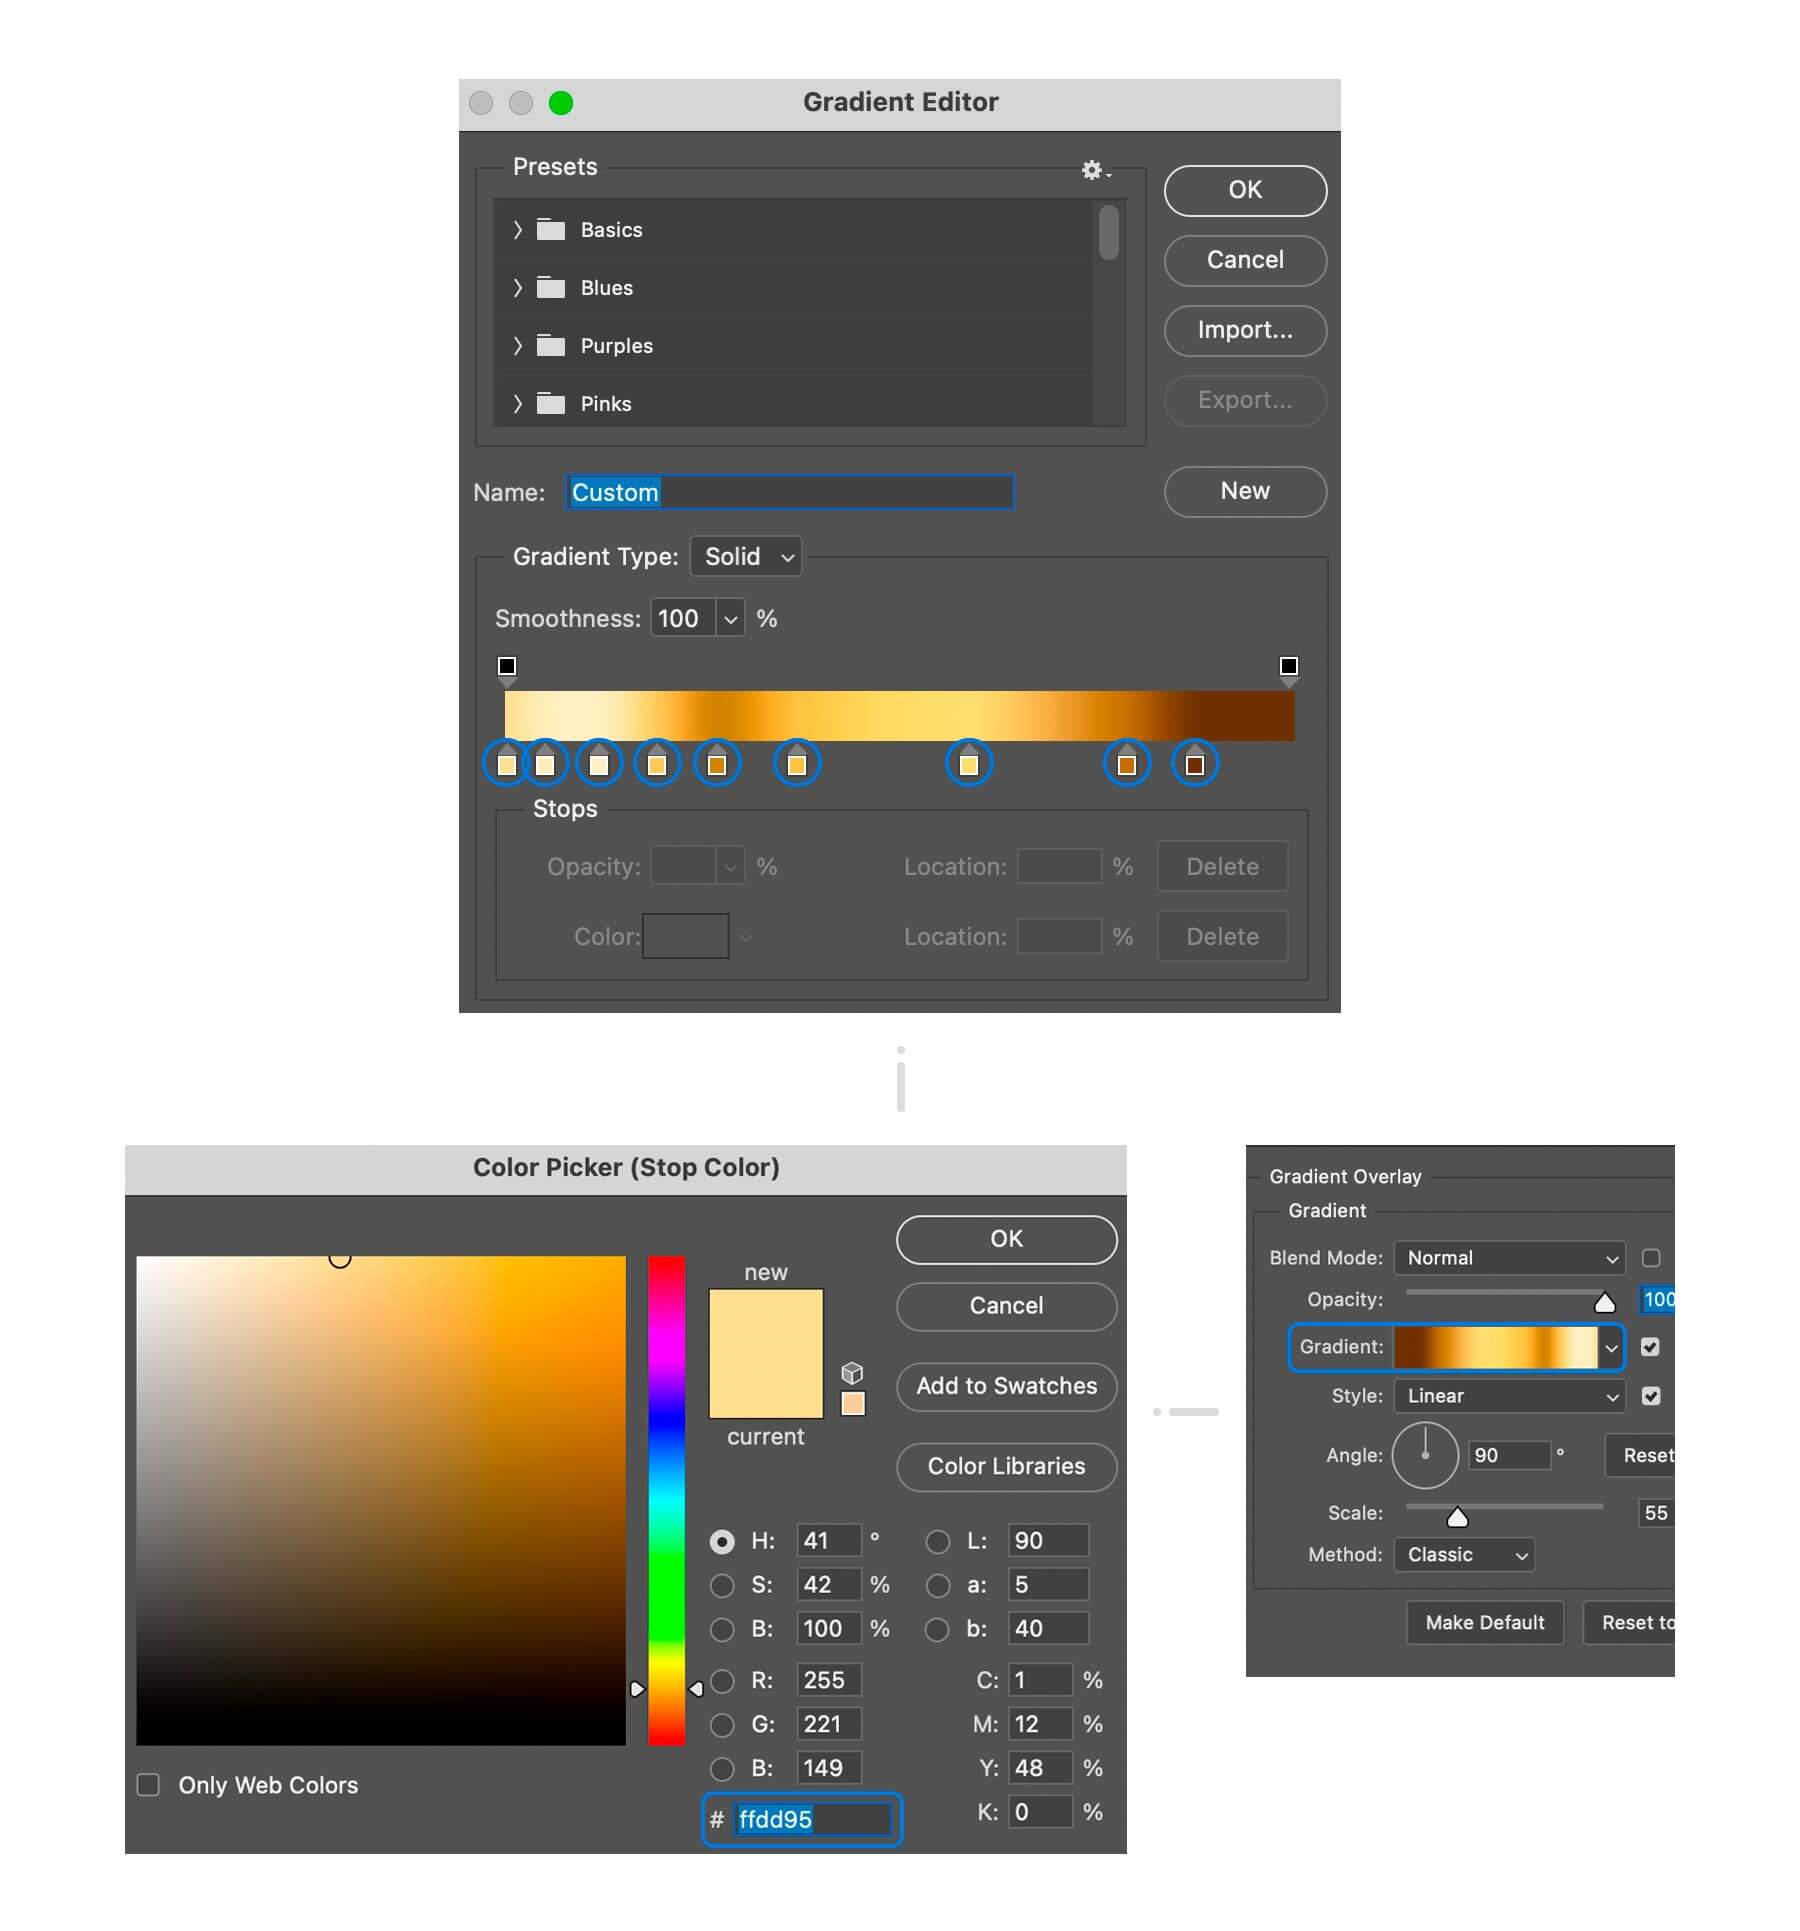
Move on to the Effect layers. Select the lower one in the layers panel, double-click it to open the layer style settings. It will be used for adding a color gradient overlay layer and some basic volume. Pick the Gradient Overlay settings. Click inside the Gradient field to generate the color palette.
- ffdd95
- ffedbc
- ffefc4
- ffc766
- af8128
- f9c155
- ffdb7b
- a06c19
- 59360c
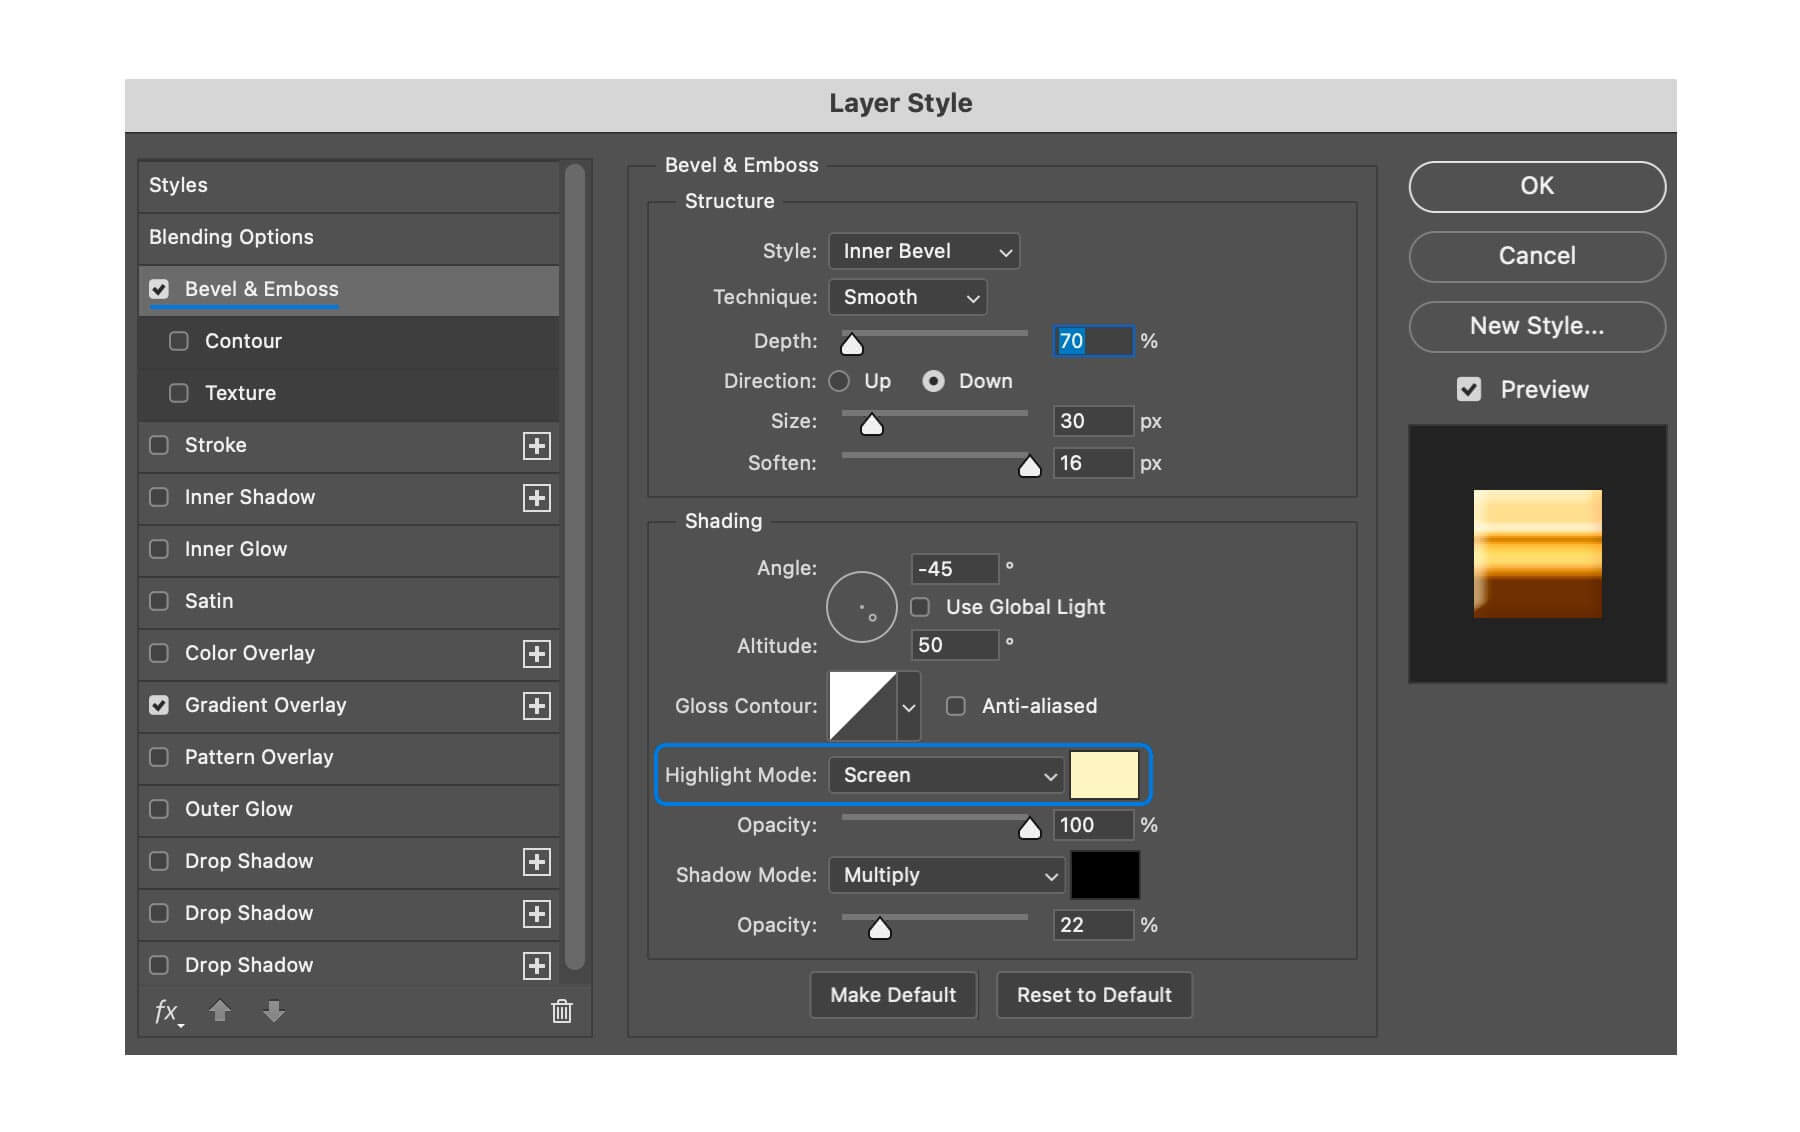
Step 5
Step 6
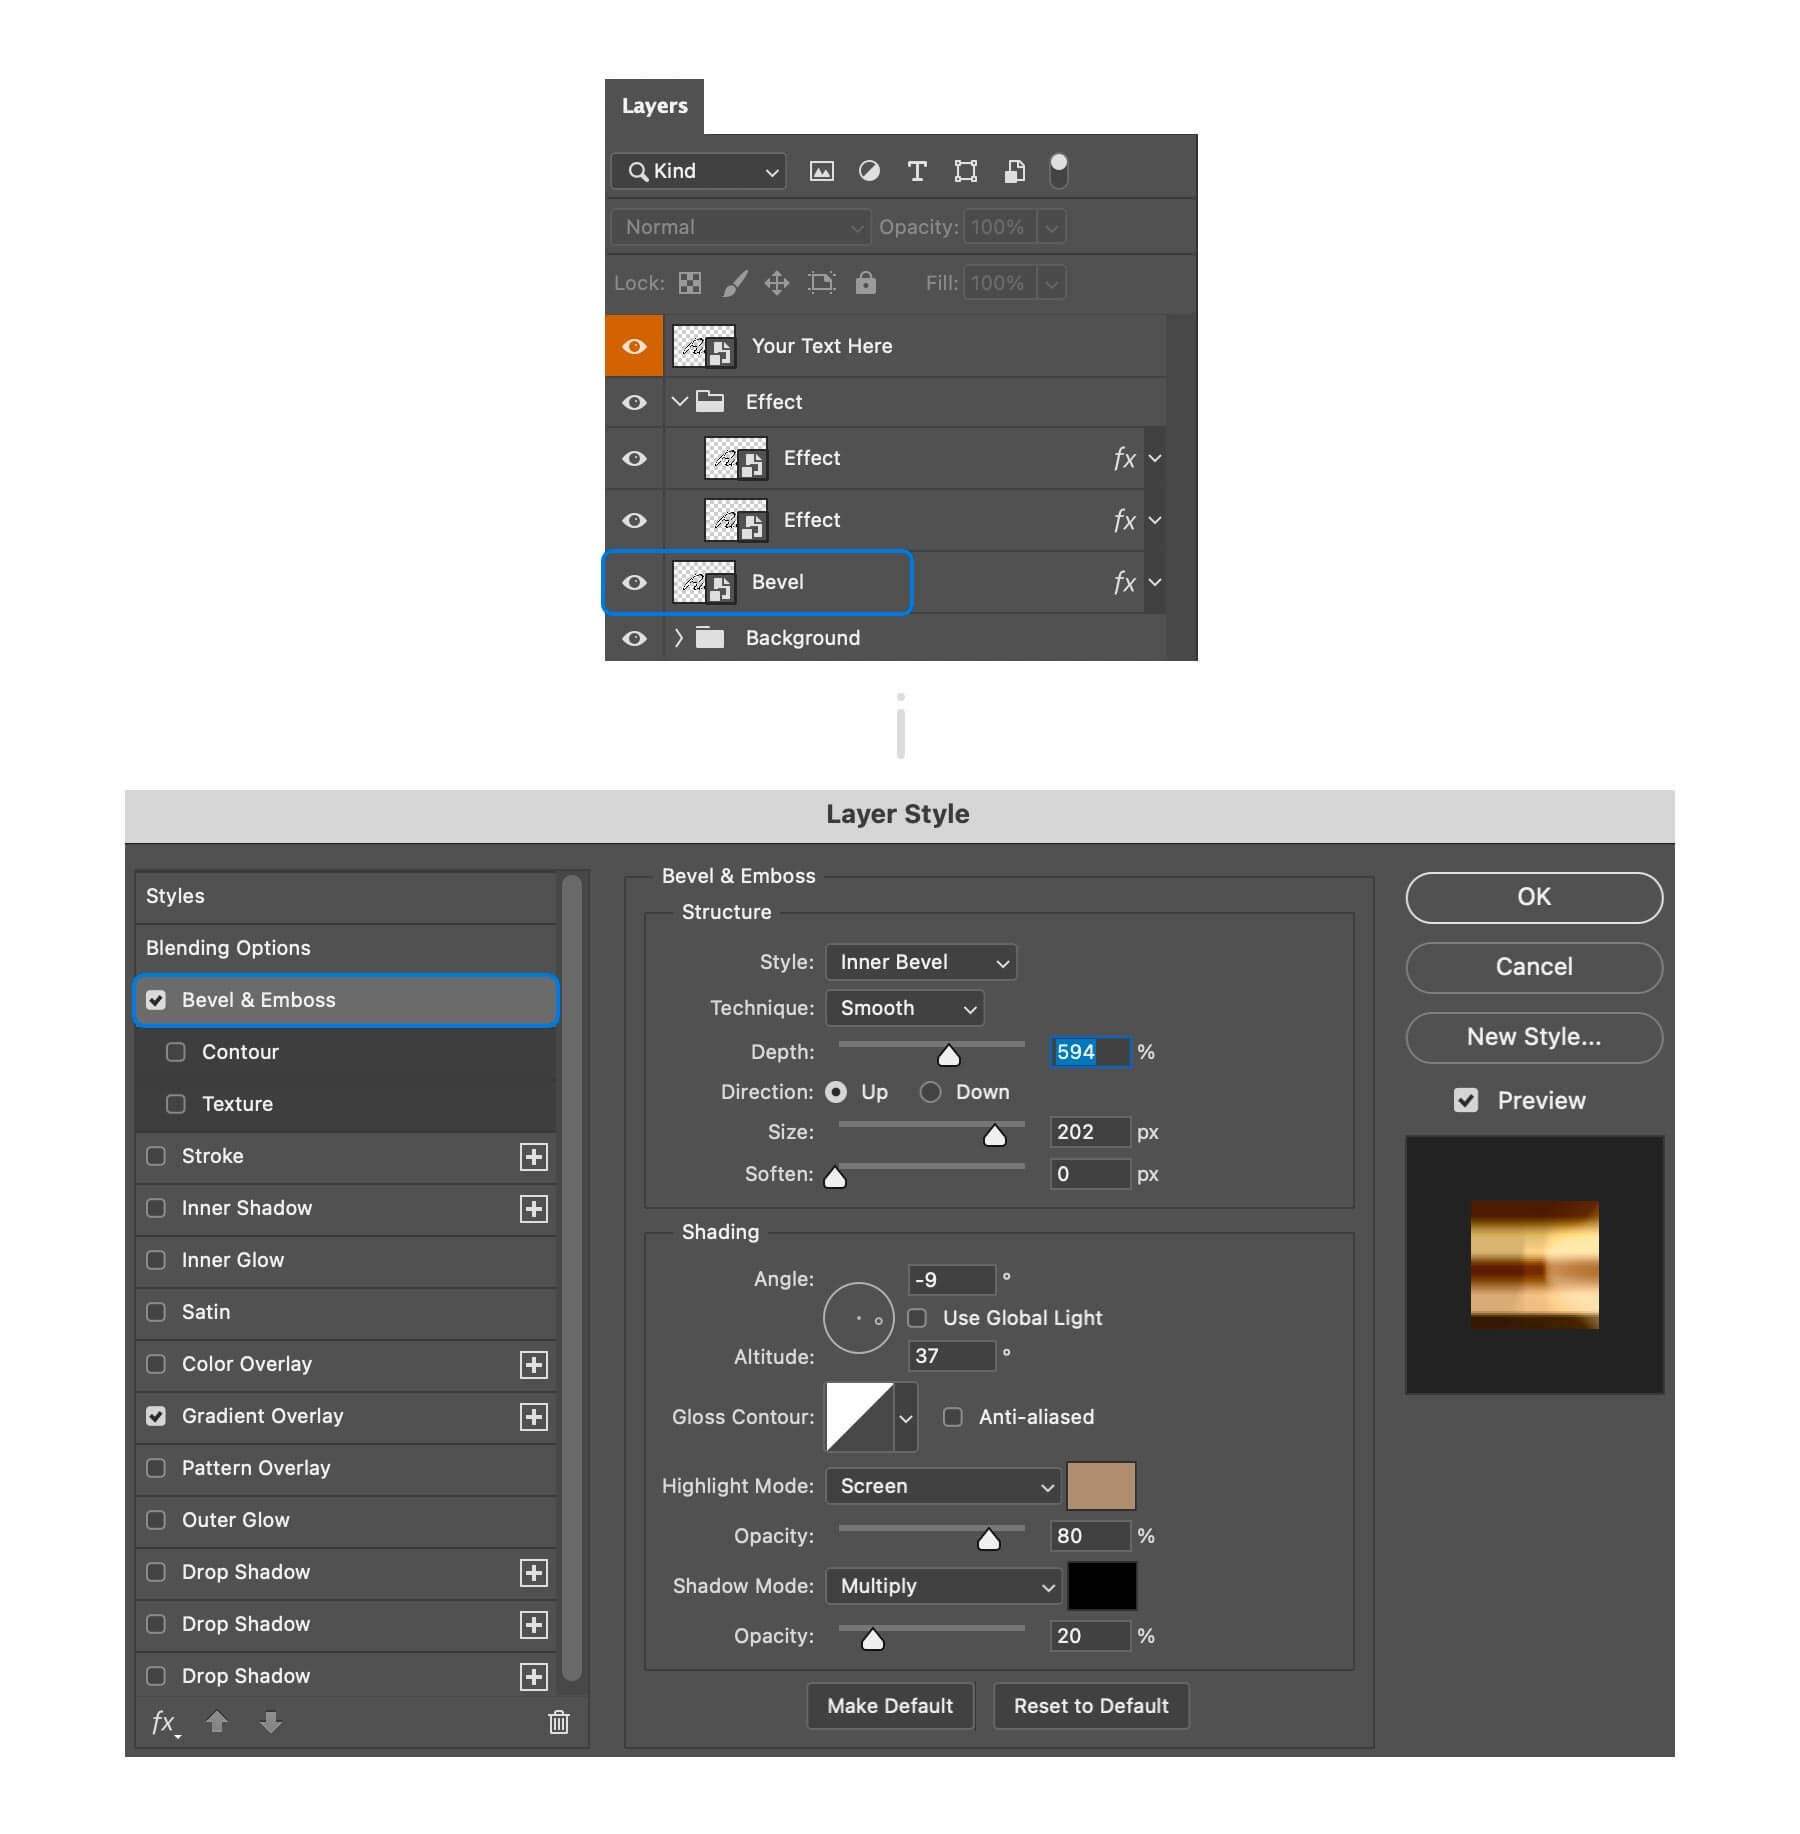
When you’re done, select the top Bevel layer, hold Shift, and select the lowest Bevel layer — it’s a quick selection feature, allowing to choose all the layers in just a few clicks. Then press Cmd/Ctrl+G to unite these into a folder; name it Bevel. Here’s what we have so far for the gold text effect in Photoshop:
Step 7
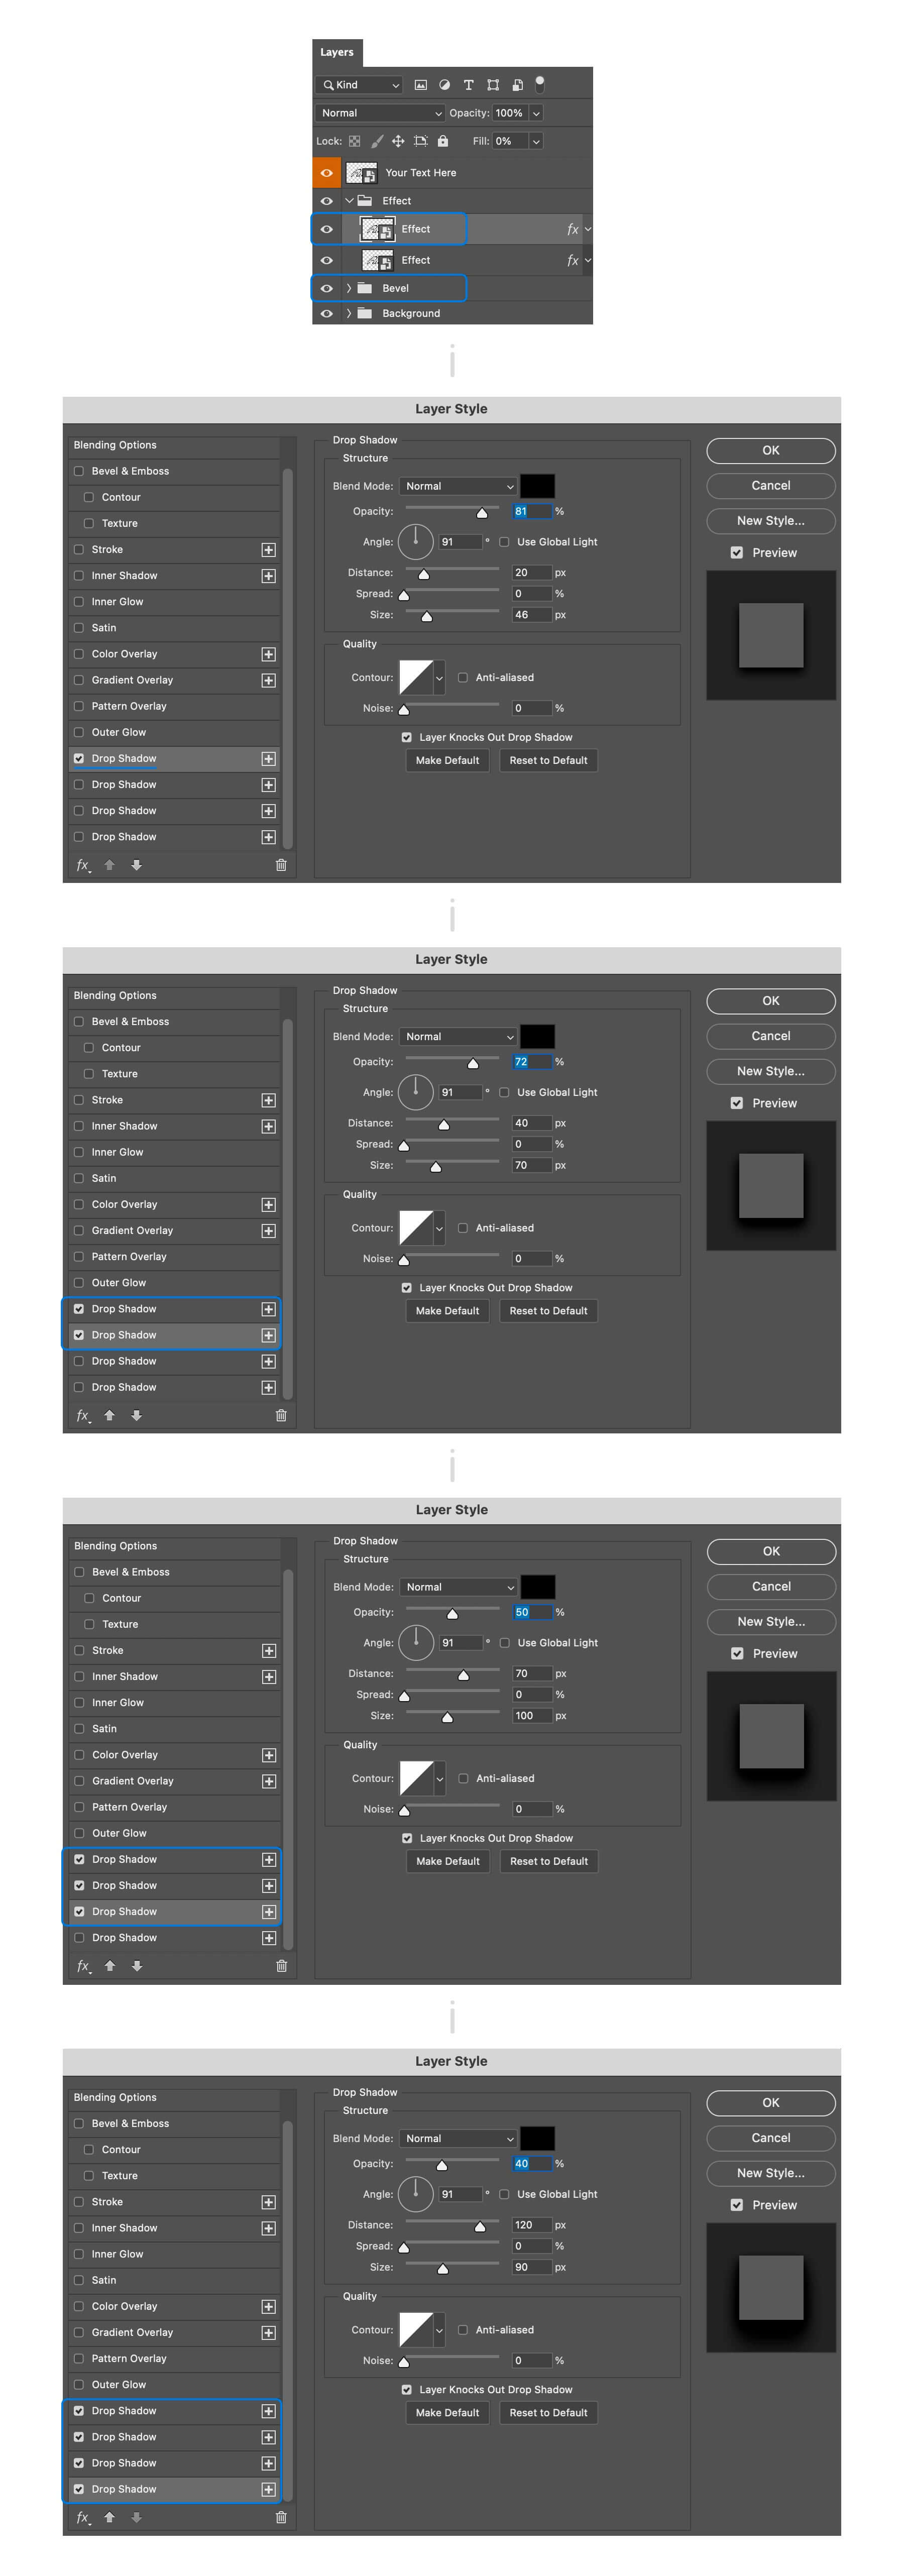
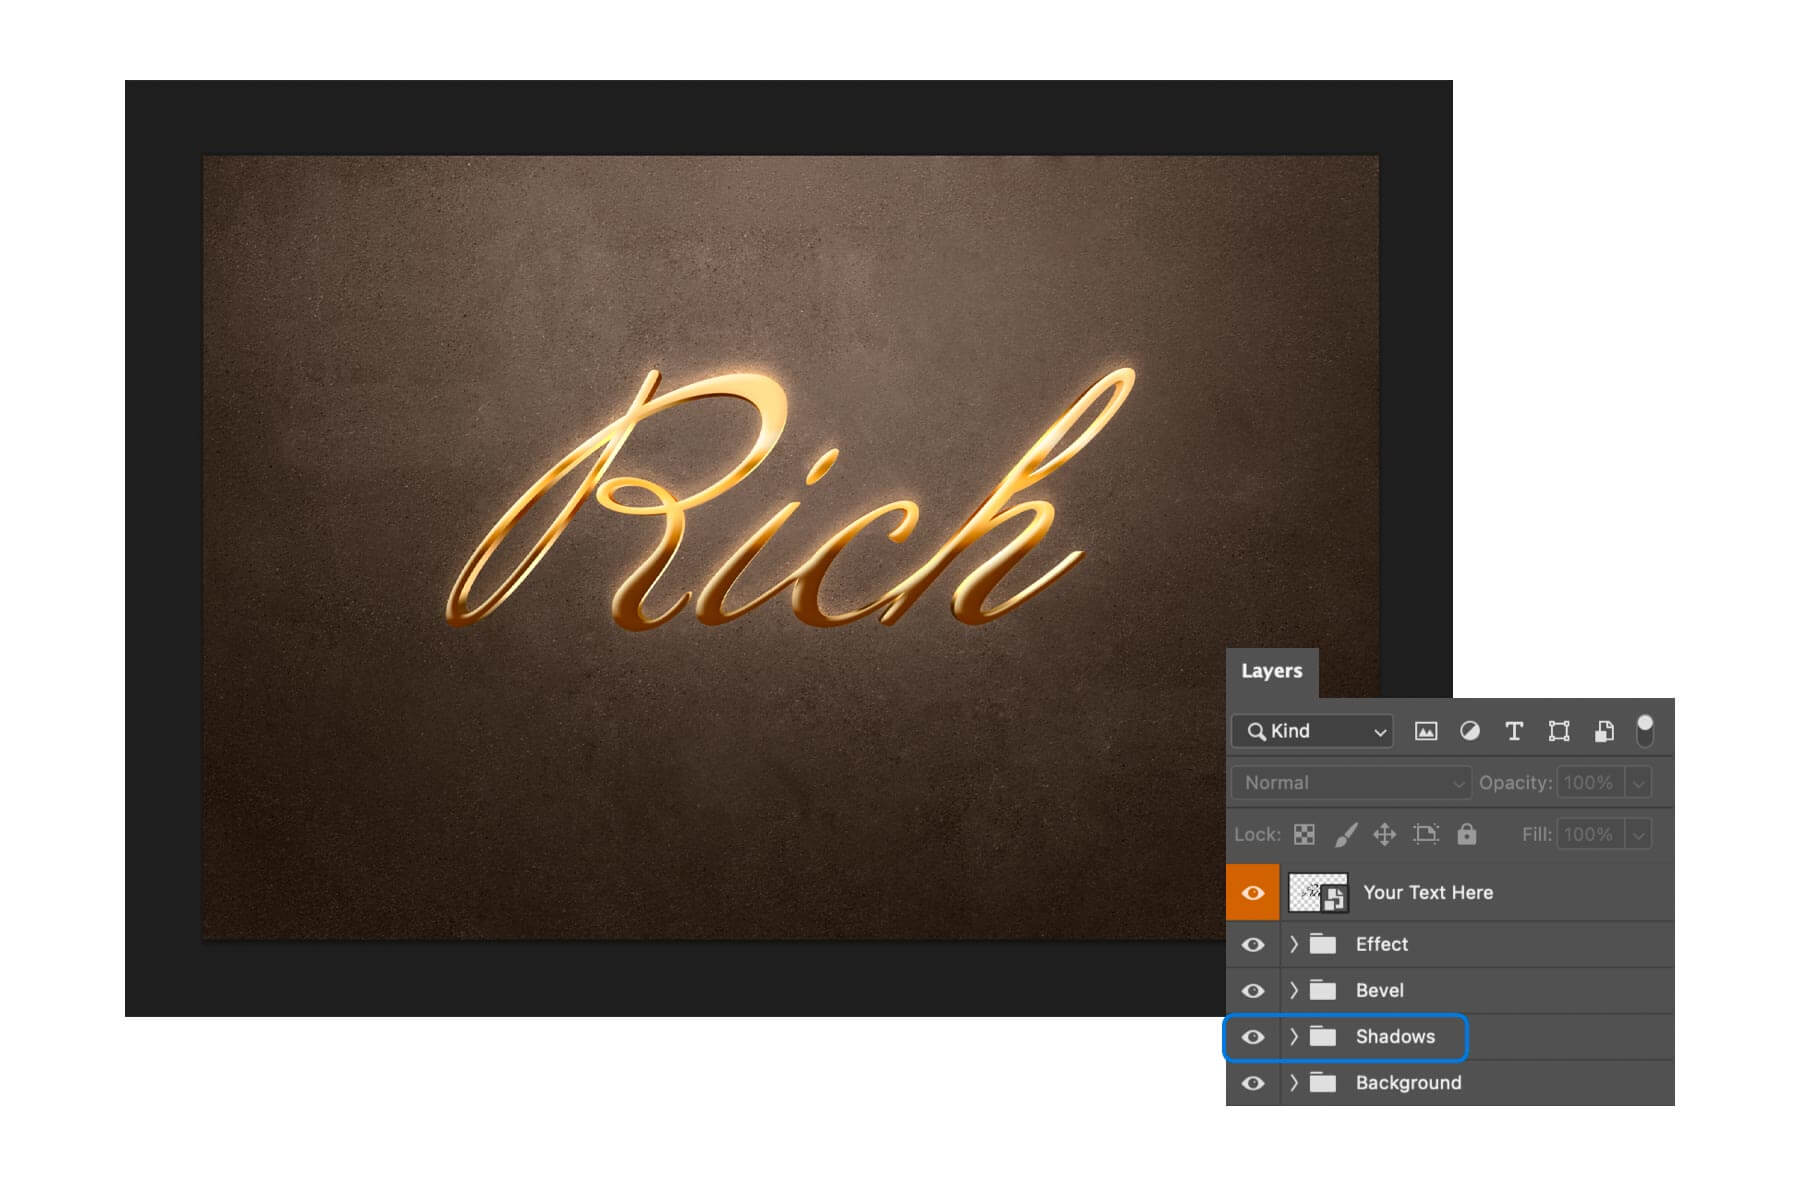
As a result, there should be 4 Drop Shadow layers checked in total. Press Ok, when you’re done. To have a neat layers arrangement with all the layer effects, you can select the Shadows folder, press Cmd/Ctrl+G, and name the folder Shadows. This is what you’ll see in the layers panel:
Step 8
The last touch for the scene to turn it into a legit Photoshop gold text effect would be a noise texture overlay, adding a pinch of realism. Create a new layer, call it Noise. Pick the Paint Bucket tool and some grey color (we used 888888 code) to fill this layer. Select this new layer, then go to the upper Photoshop menu: Filter > Noise > Add Noise.
These are the values you need to set for this layer style in the appeared Add Noise menu required for the desirable effect.
The freshly-created layer needs to be placed under the orange-marked Smart Object layer and have all the additional parameters set right, such as the layer style (Overlay) and 70% opacity:
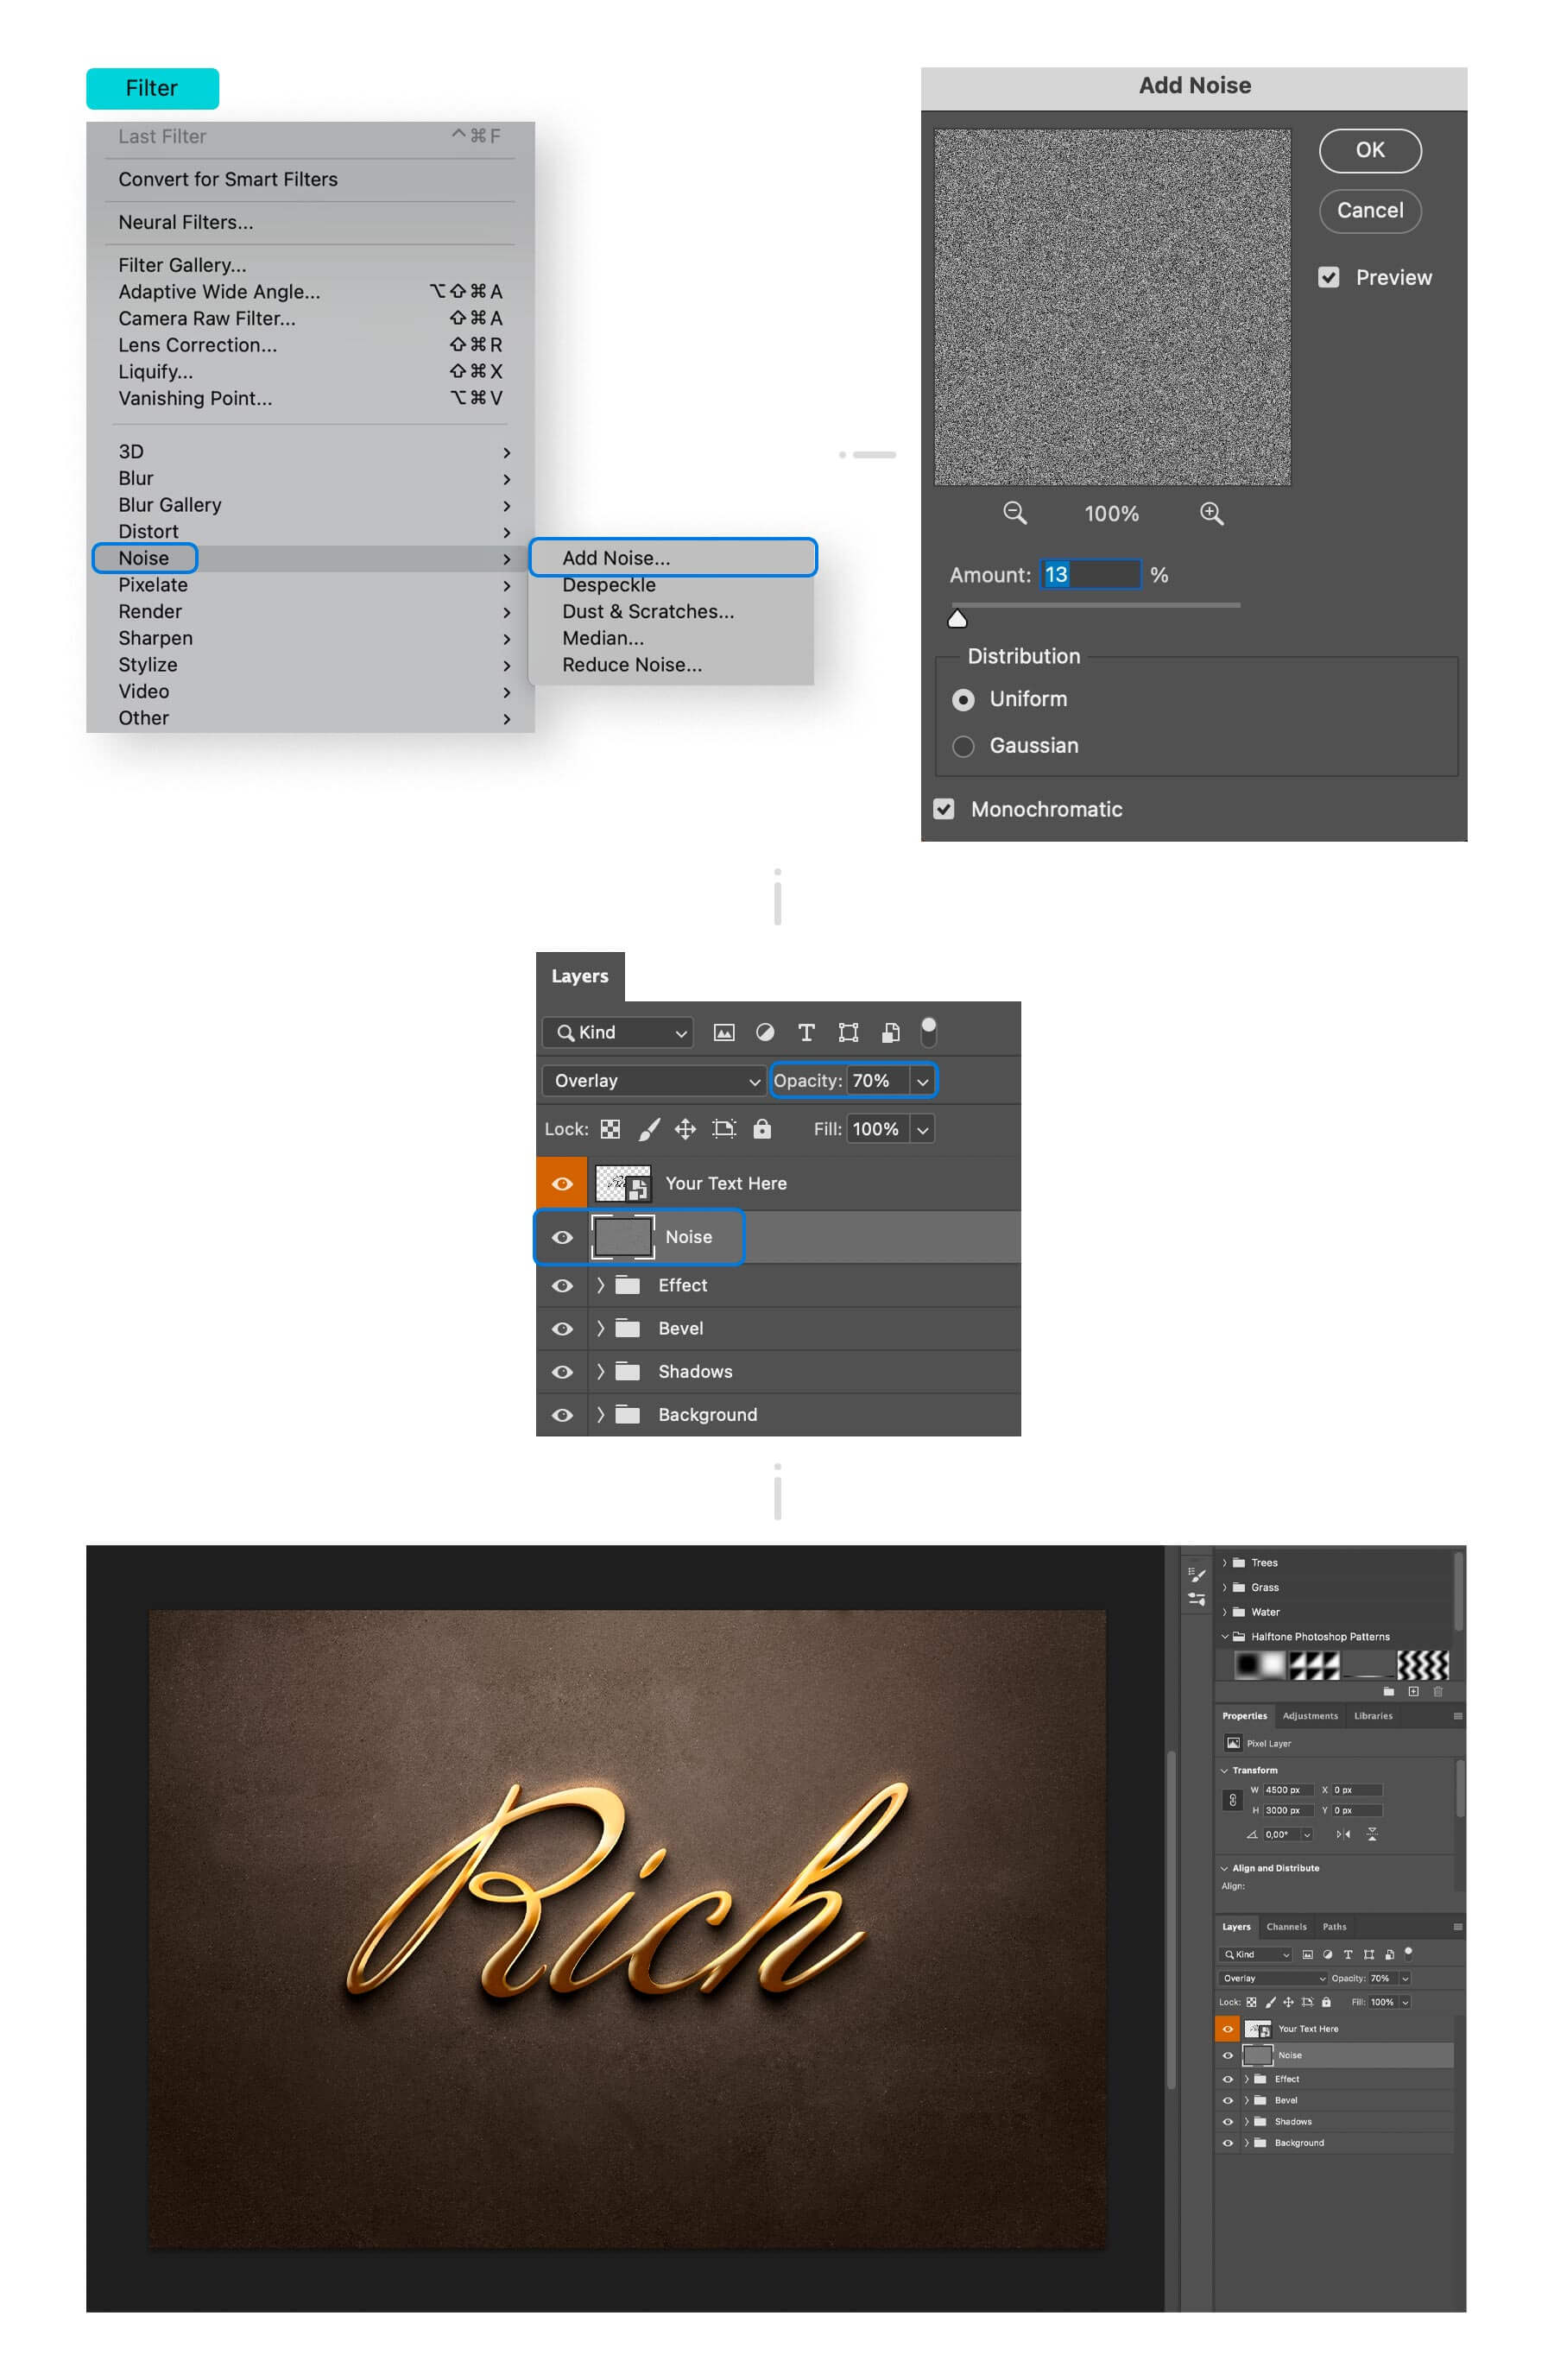
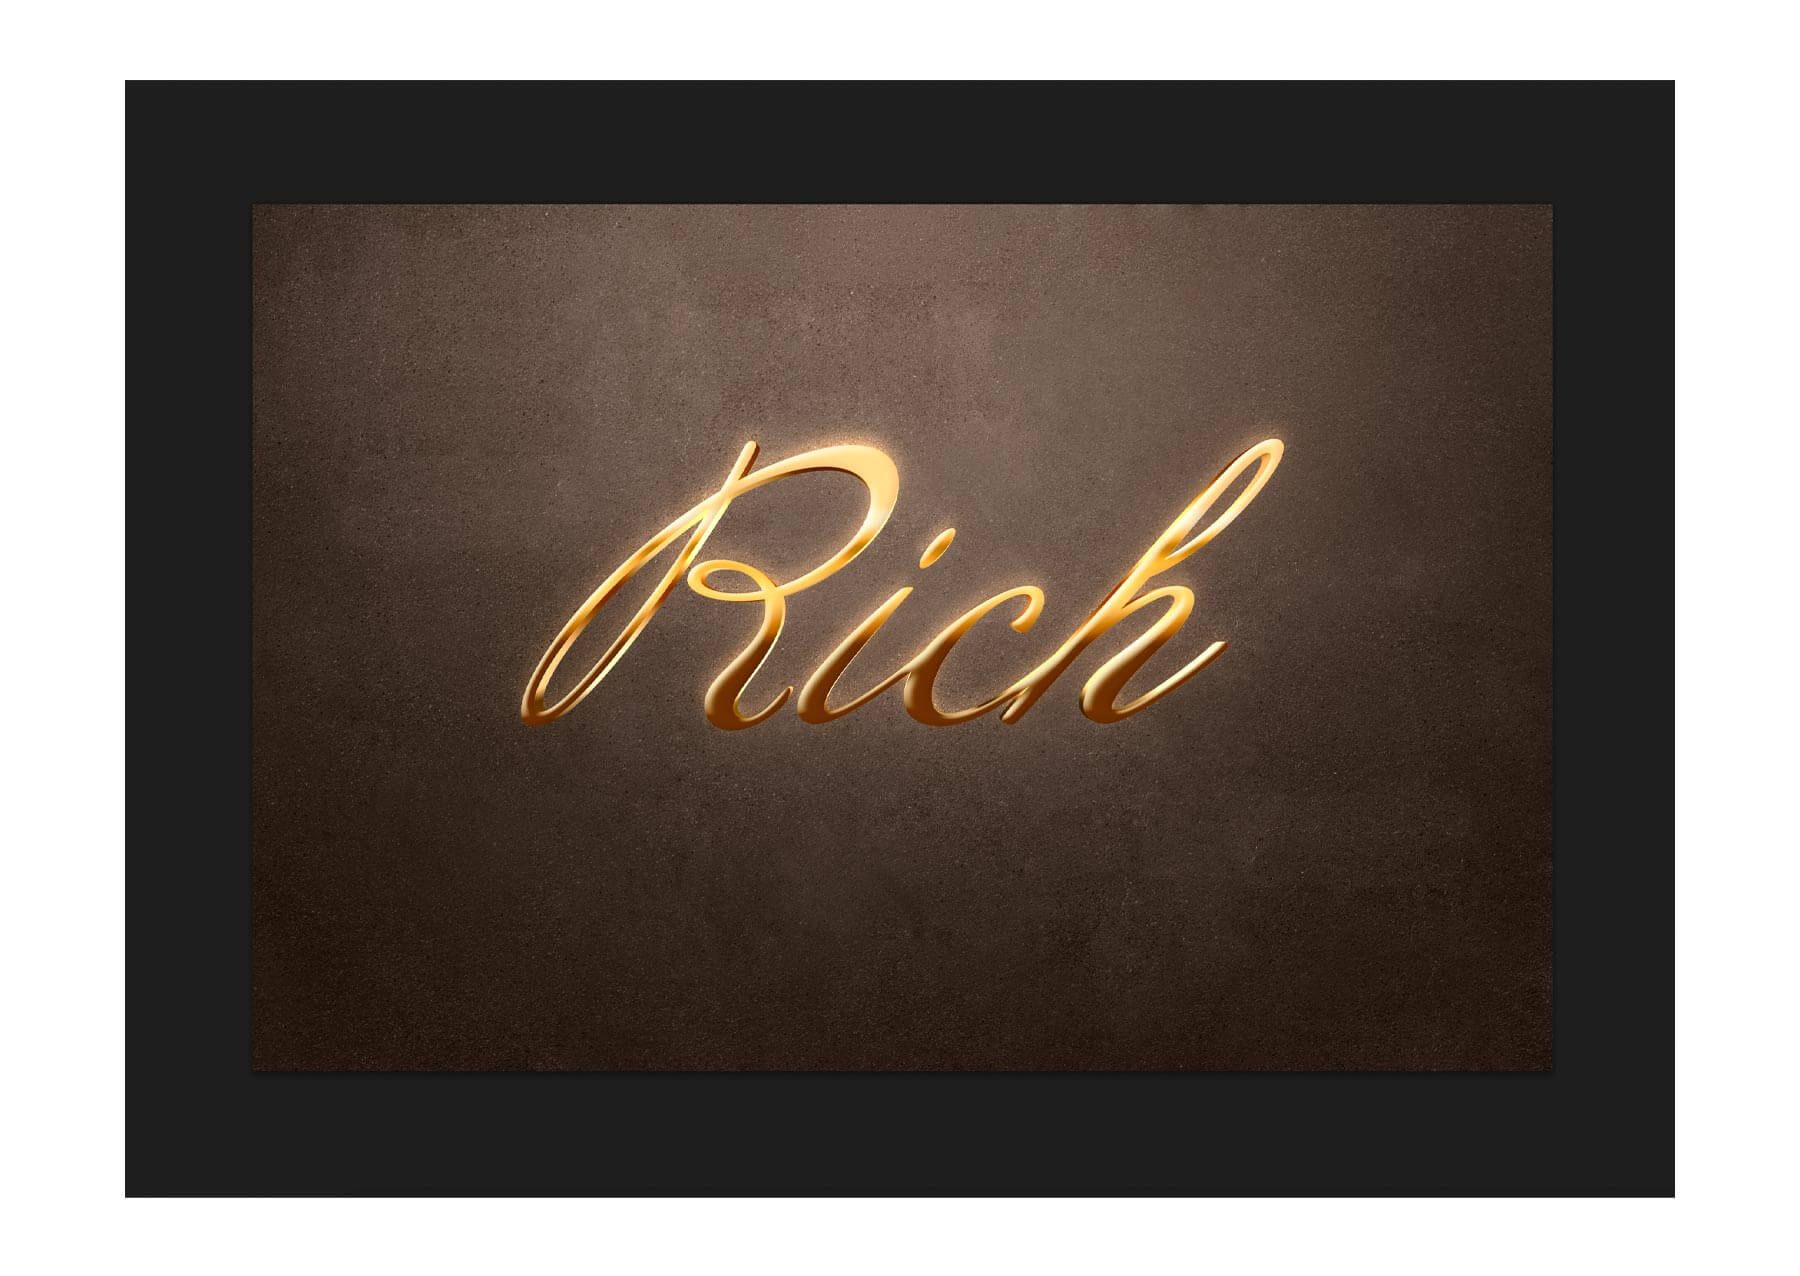
Finally, you have a polished gold text effect in Photoshop created from scratch! Save the achieved result by pressing Cmd/Ctrl+S or using the menu: File > Save.
